September 2026 · 20 topics · Fictional example data
Screenshots show the current app with September 24, 2026 as the example date. Select any image to see it at full size. Browser file choosers and date controls vary by device.
Today List is a personal task tracker. Use it to capture tasks, organize them into lists, plan due dates, and record progress. No account is required for local use.
Watch the walkthrough
0:38 · Subtitled · Niki narration
Subtitles are embedded in the video. Use the player controls to adjust volume or mute, and fullscreen for a closer view.
Transcript & narration timings
Select a timestamp to play that step.
Step 1. Open Today List in your browser. Your saved tasks appear in this workspace.
Step 2. Use the left navigation to switch between task views and lists.
Step 2. The top bar reports save status. Progress, quick add, search, and filters sit above the tasks.
Step 3. Each row shows a checkbox, editable title, notes, list, date, priority, and delete button.
Step 3. Select a task title to open its details. Cancel closes the editor without saving.
Step 4. Help opens a separate tab. Here is the same guide with topic navigation and search.
Step 4. Search for a topic, or use Download PDF for the existing printable guide.
Timing logs use 30 fps, with zero-based start frames included and end frames excluded.
Open your workspace
Open the app in your browser. On a new browser or site address, the task area is empty. Select New task, use the quick-add field, or select Add a task in an empty view.
Recognize the main areas
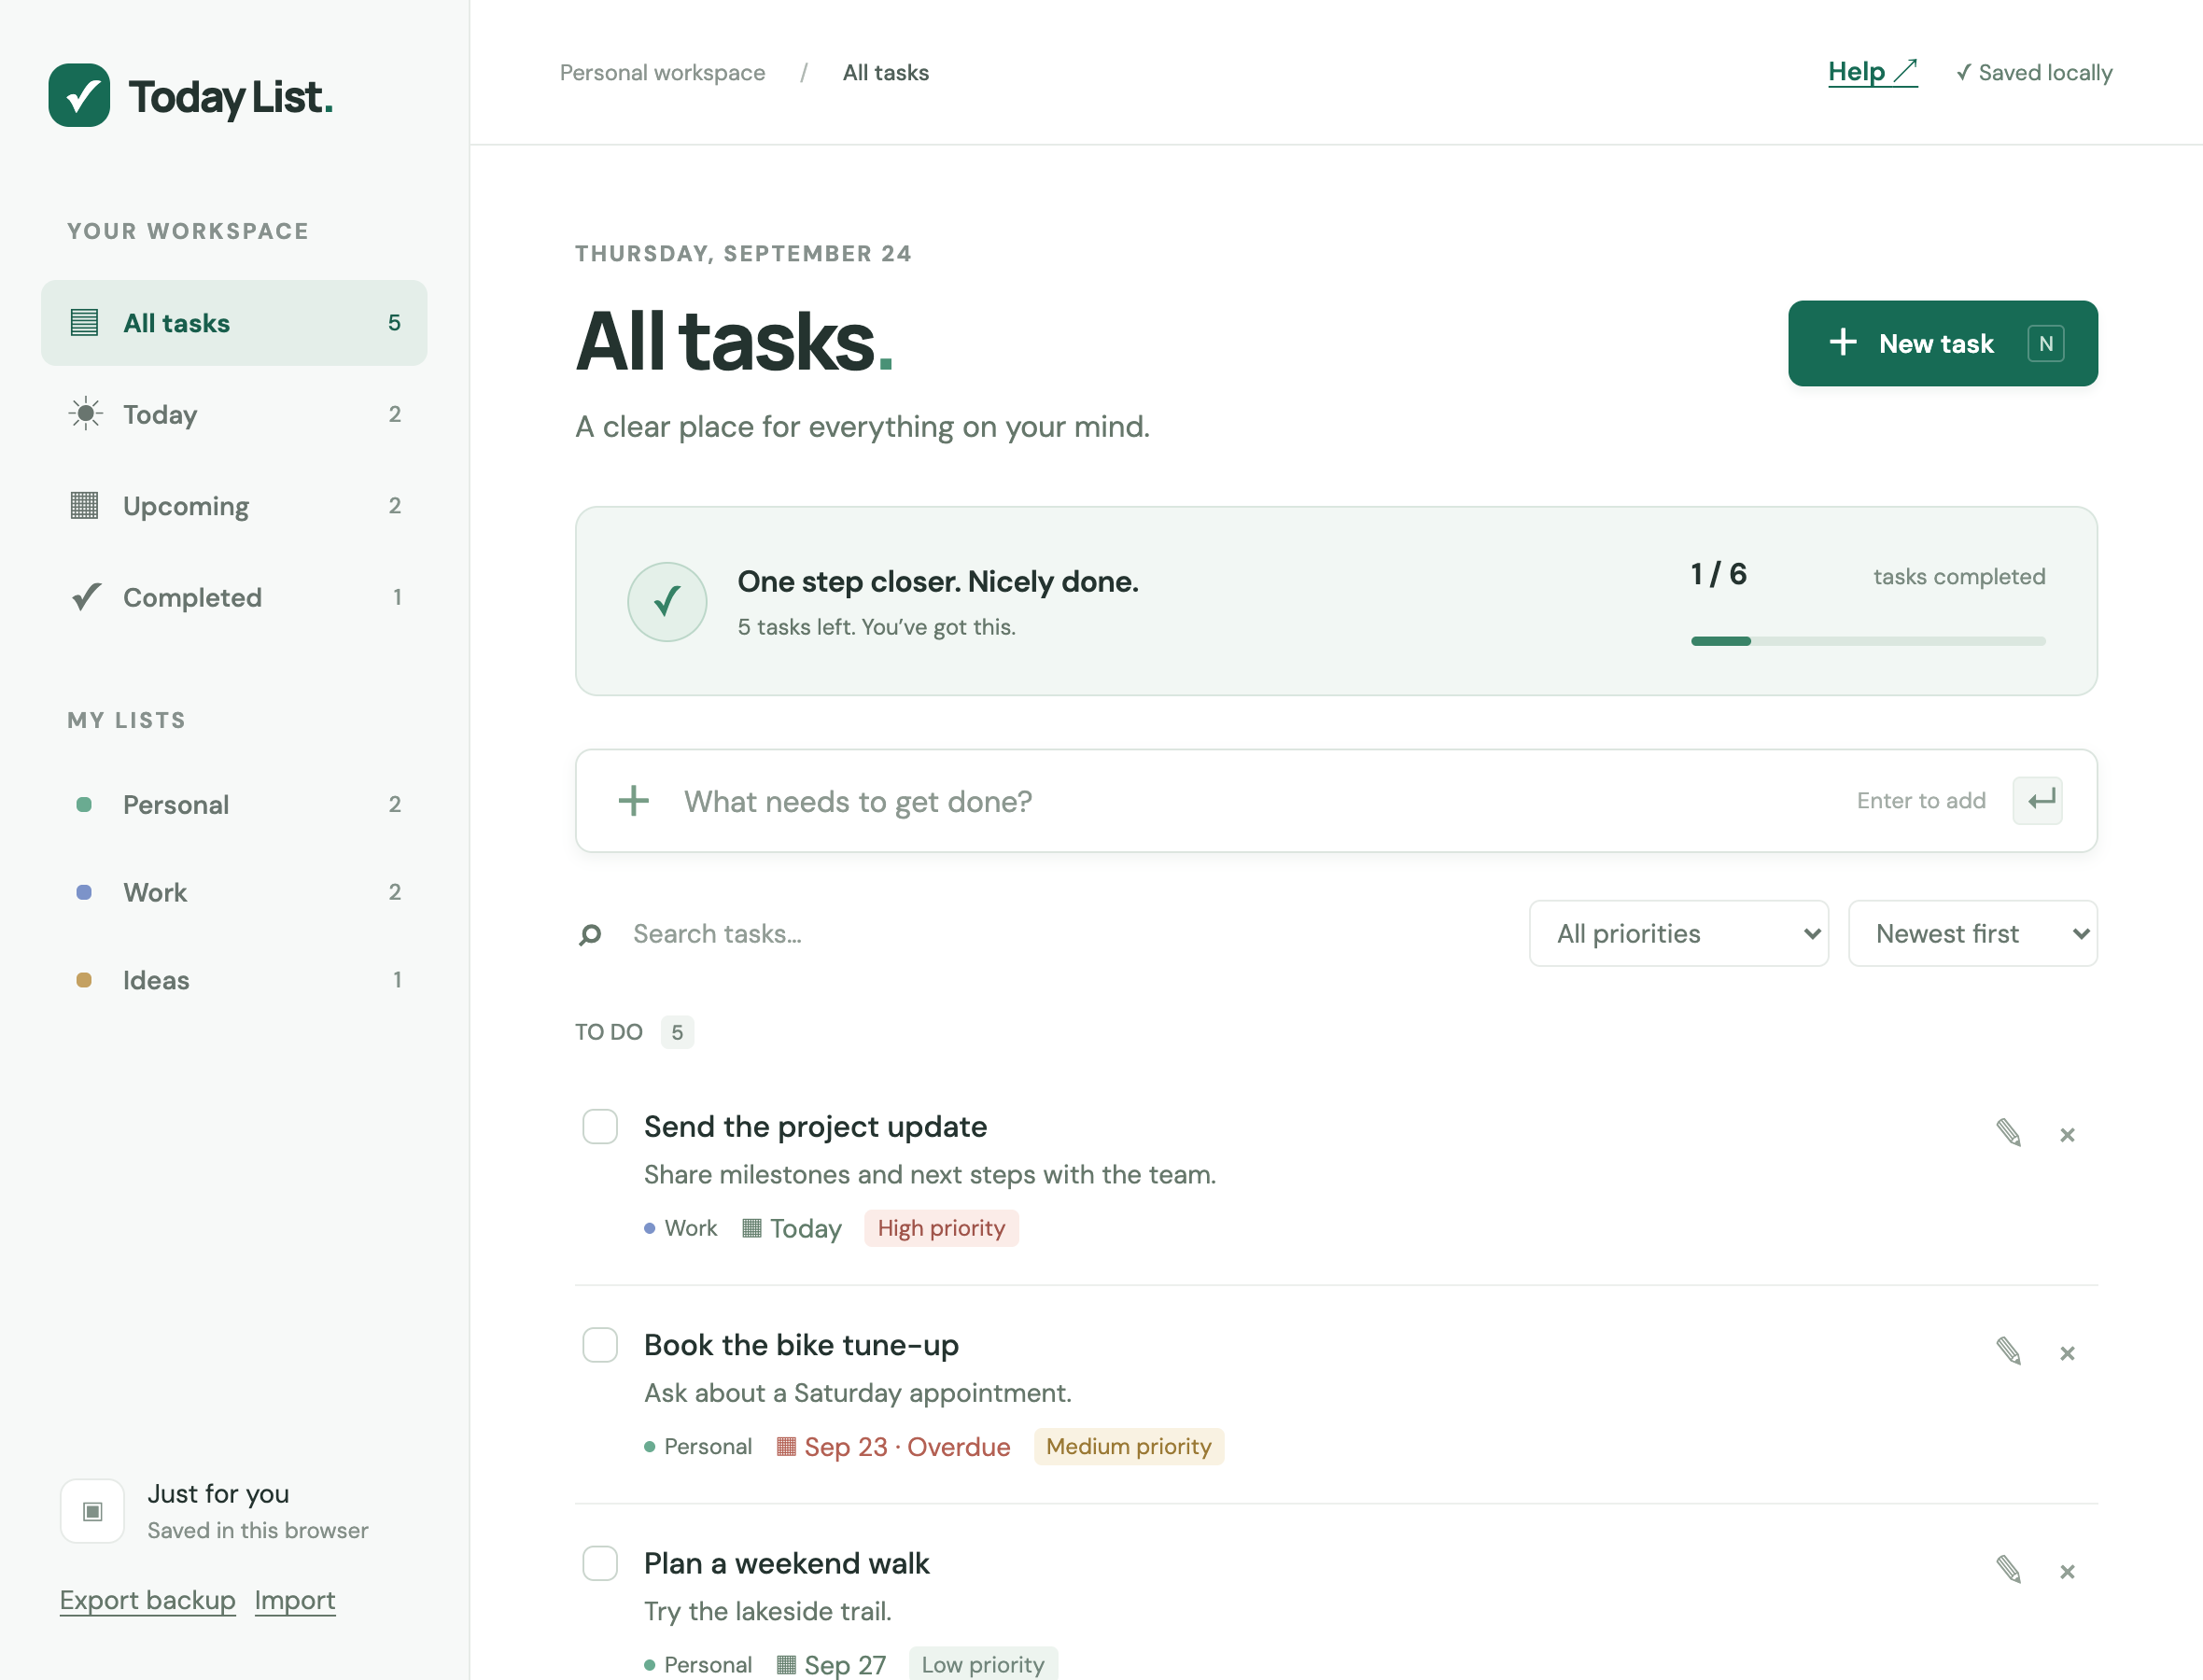
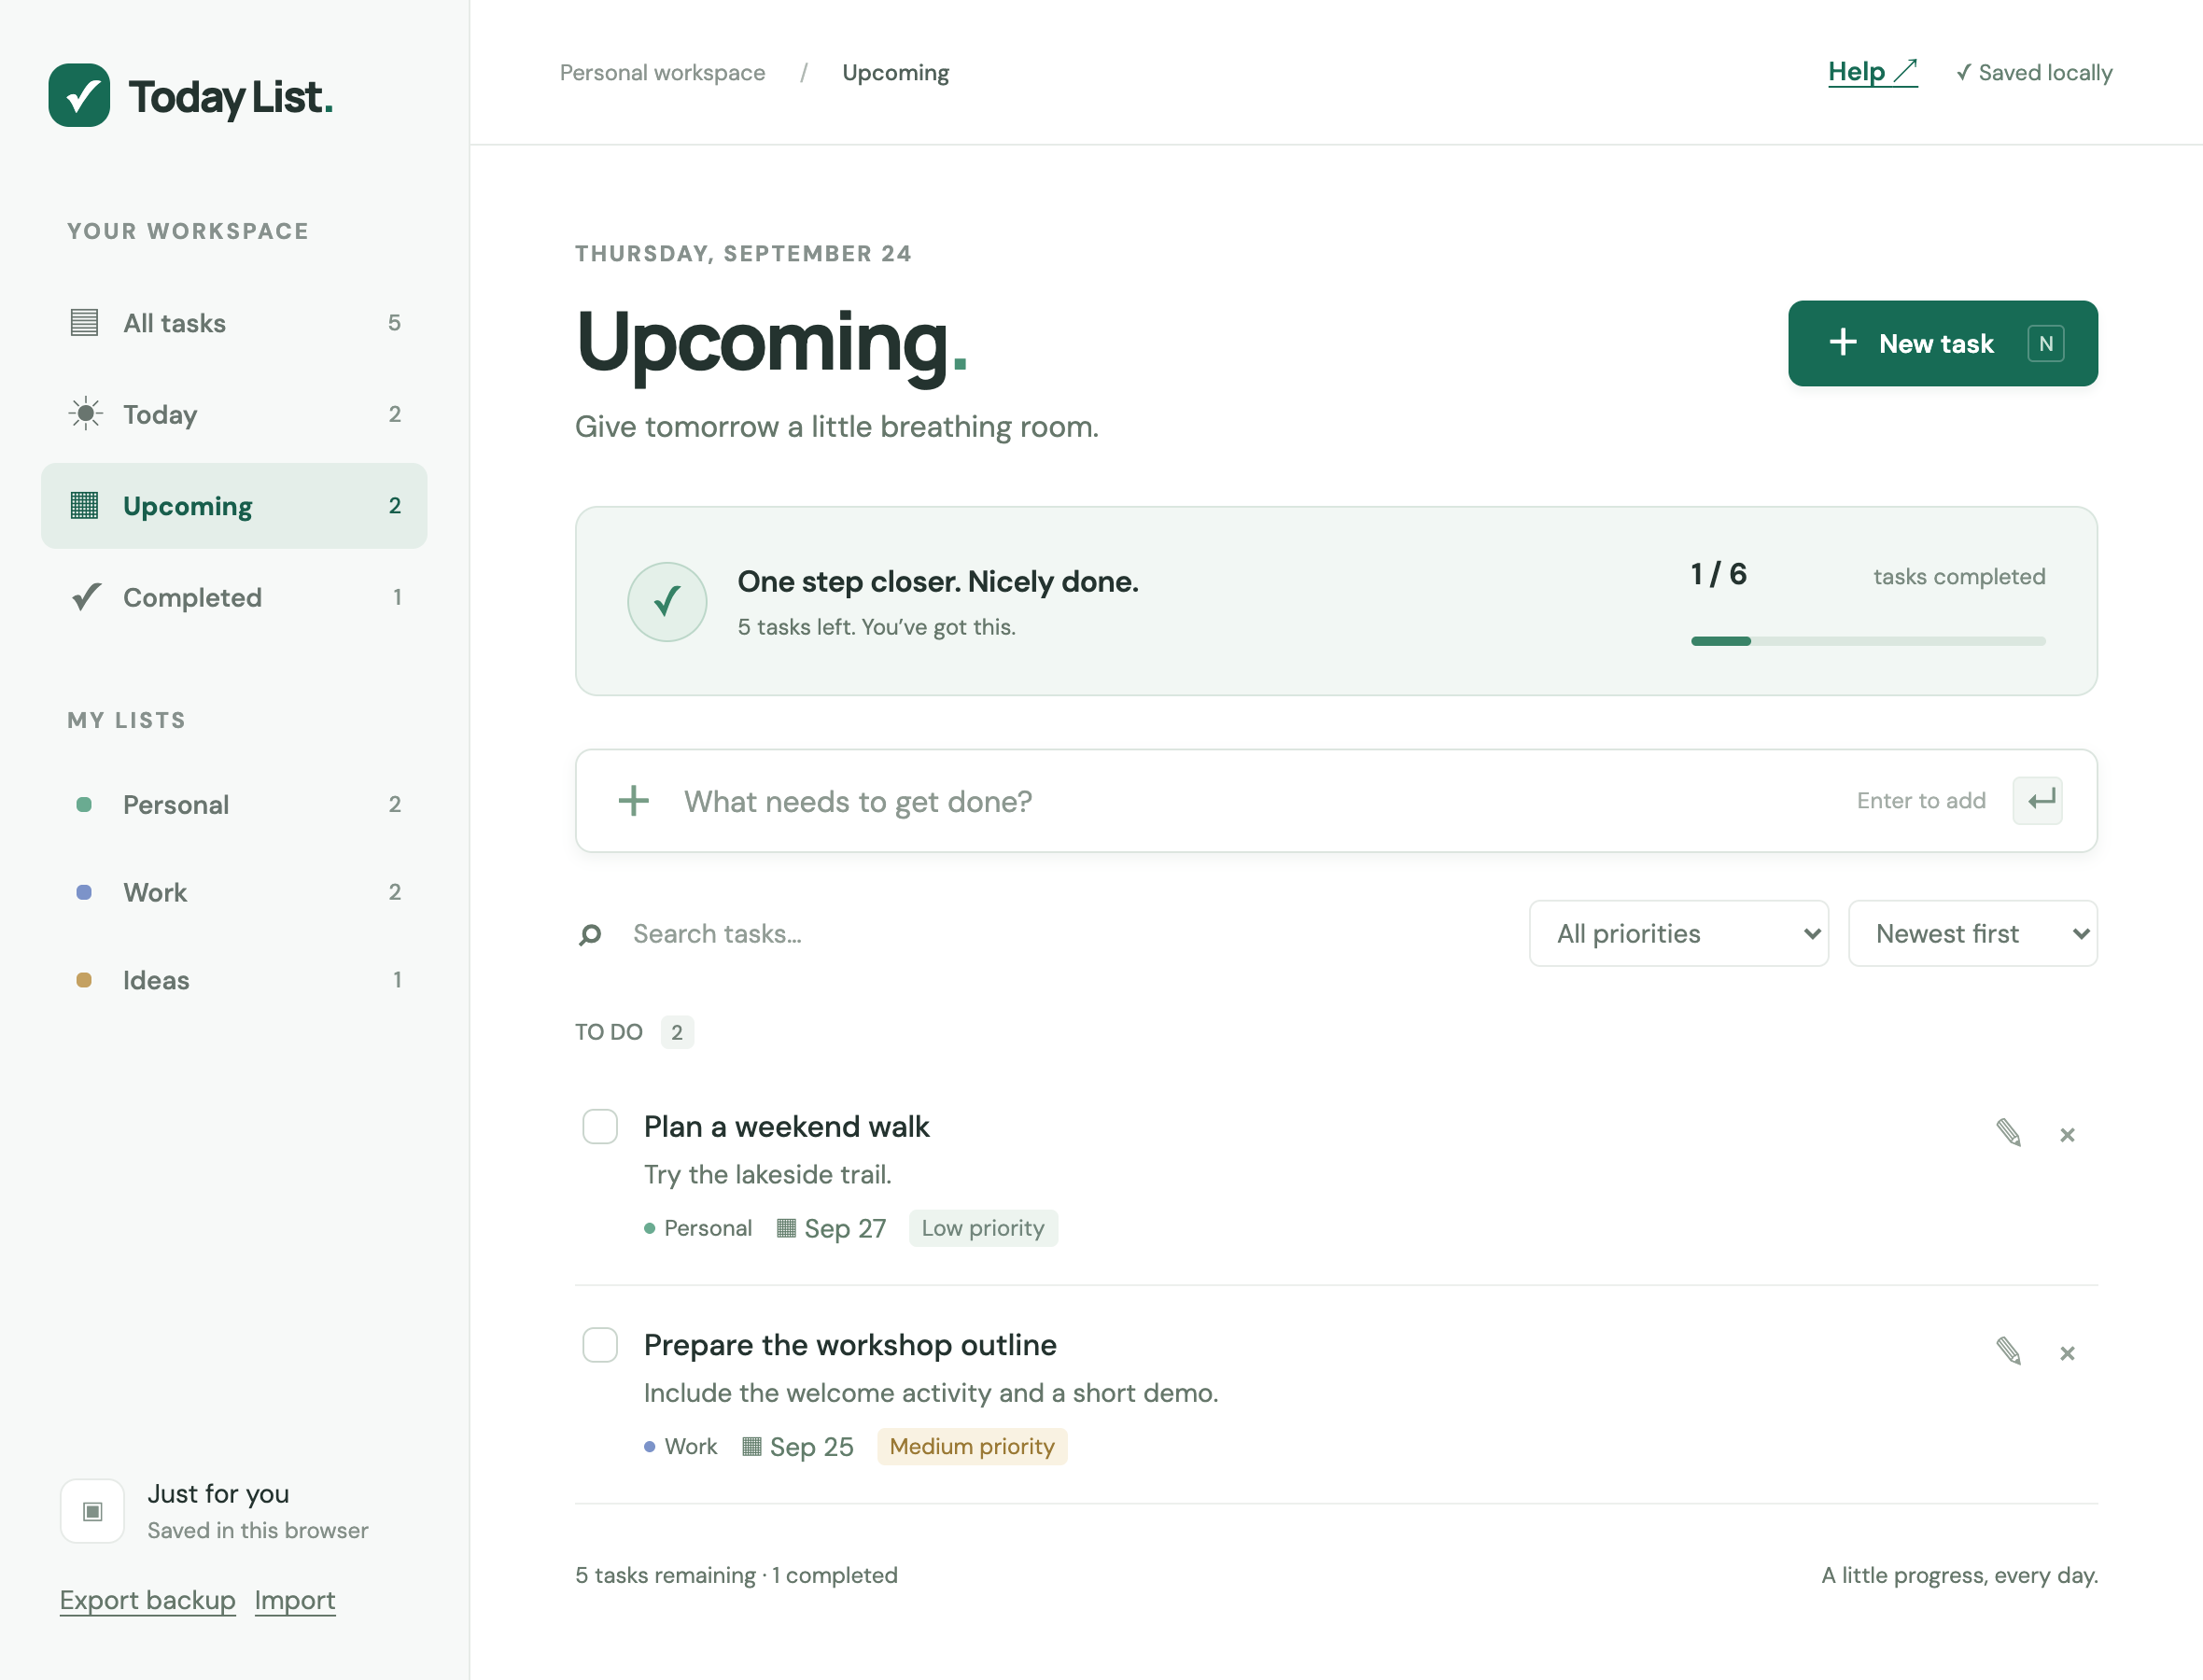
The left navigation contains task views and lists. The center contains your progress, quick-add field, search, filters, and task rows. Export backup and Import are at the bottom of the desktop sidebar. The top bar shows the save status and Help link.
Desktop workspace with fictional example tasks. The screenshots use September 24, 2026 as the current date. Select image to enlarge.
Read a task row
The checkbox completes or reopens the task. Select its title or pencil icon to edit it. Under the title, the row shows notes, list, due date if set, and priority. The × at the right deletes that task.
Open this guide again
Select Help in the top bar. It opens in a separate tab so your current task editor stays available. Use the topic links or Search help to find instructions. Select Download PDF for the complete illustrated guide.
Timing logs use 30 fps, with zero-based start frames included and end frames excluded.
Choose the view or list first
Select Work, Personal, or Ideas to create the task in that list. From Today, the due date defaults to today. From Upcoming, it defaults to tomorrow. Other views start with no due date. Outside a named list, the default list is Personal.
Type a task name
Select What needs to get done? and type a clear action, such as Pick up a library book. Names must contain 1-200 characters after trimming surrounding spaces; a blank or spaces-only name will not create a task.
Enter the task name in the quick-add field. Select image to enlarge.
Add it
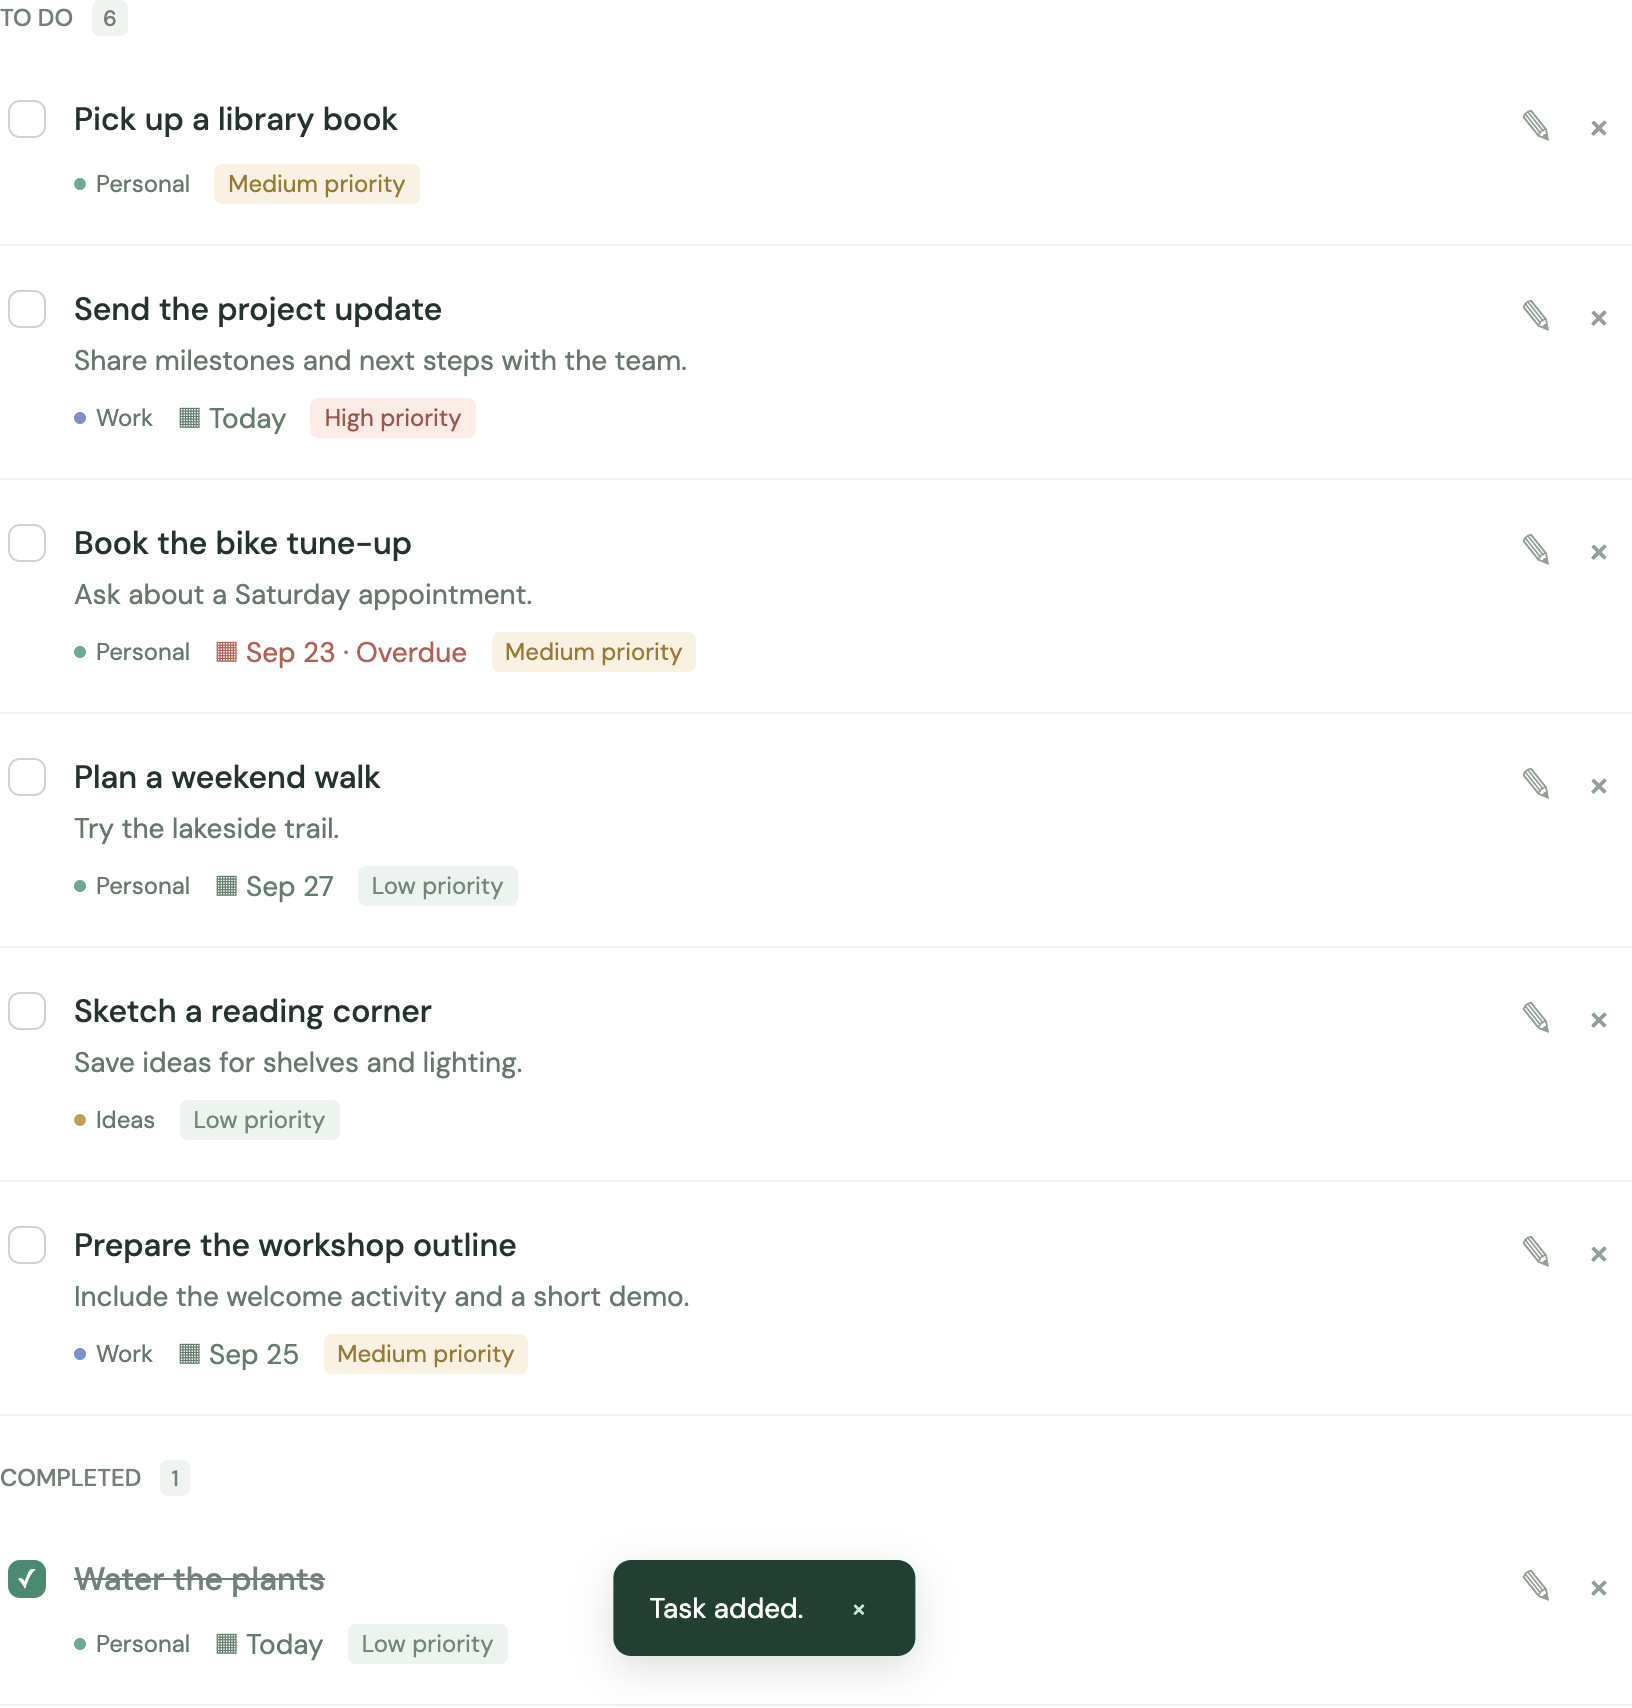
Press Enter or select the arrow button at the right of the field. A successful save clears the input, adds the task, and shows Task added. Quick-added tasks have Medium priority, no notes, and an incomplete status.
The new library task appears in the task list. Select image to enlarge.
Add more detail if needed
Select the task name or pencil icon to open its editor. If it is hidden by your current search or priority filter, clear those controls or select All tasks in the navigation.
Timing logs use 30 fps, with zero-based start frames included and end frames excluded.
Open the editor
Select New task at the top of the workspace. You can also press N when focus is outside an input, text area, or selection control.
Fill in the fields
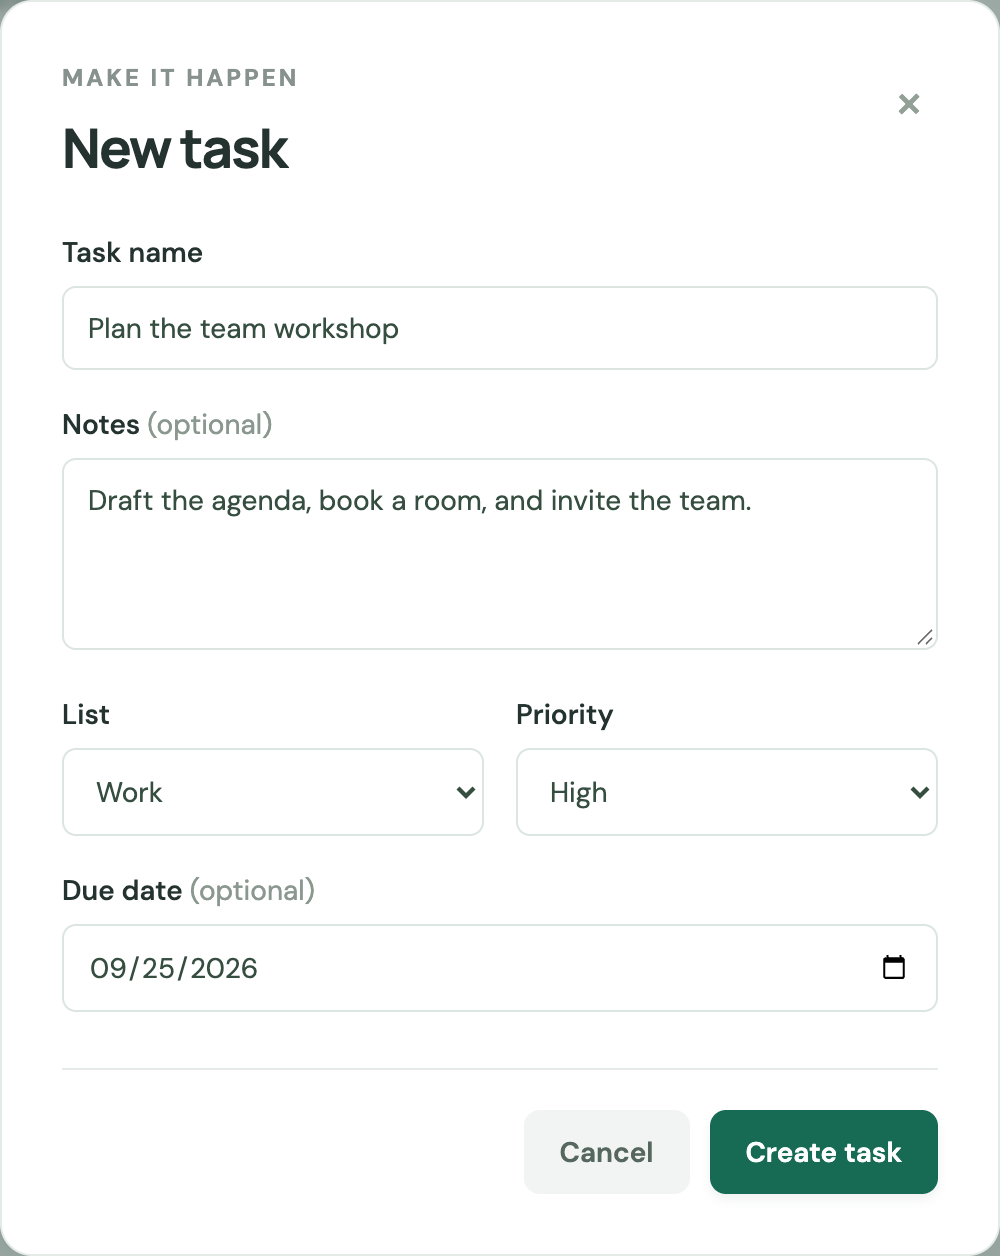
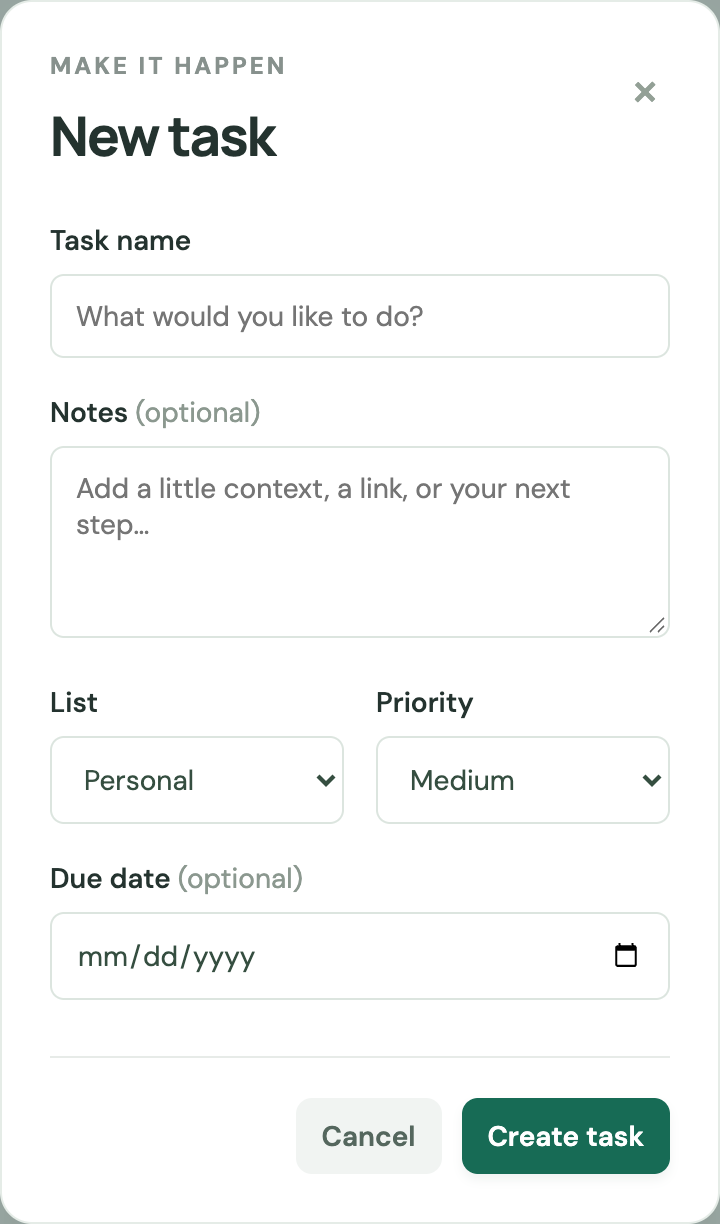
Enter a Task name (required, up to 200 characters). Add Notes if useful (up to 5,000 characters). Choose Personal, Work, or Ideas under List, then Low, Medium, or High under Priority. Set Due date using the browser date picker or date input; leave it blank if the task has no deadline.
Completed example: a Work task with notes, High priority, and a future due date. Select image to enlarge.
Save the task
Select Create task. When saving succeeds, the dialog closes and Task added appears. Check the row for the name, list, priority, and due date you intended.
The saved task displays the details entered in the editor. Select image to enlarge.
Leave without saving
Before submitting, select Cancel, the × in the top-right corner of the editor, or press Escape. The unsaved details are discarded; there is no draft autosave.
Timing logs use 30 fps, with zero-based start frames included and end frames excluded.
Find and open the task
Select its title or the pencil icon on the right. Completed tasks can also be edited: select Completed, then open the task.
Update the details
Change any combination of name, notes, list, priority, or due date. To remove a due date, clear the date field using your browser control. To remove notes, delete their text.
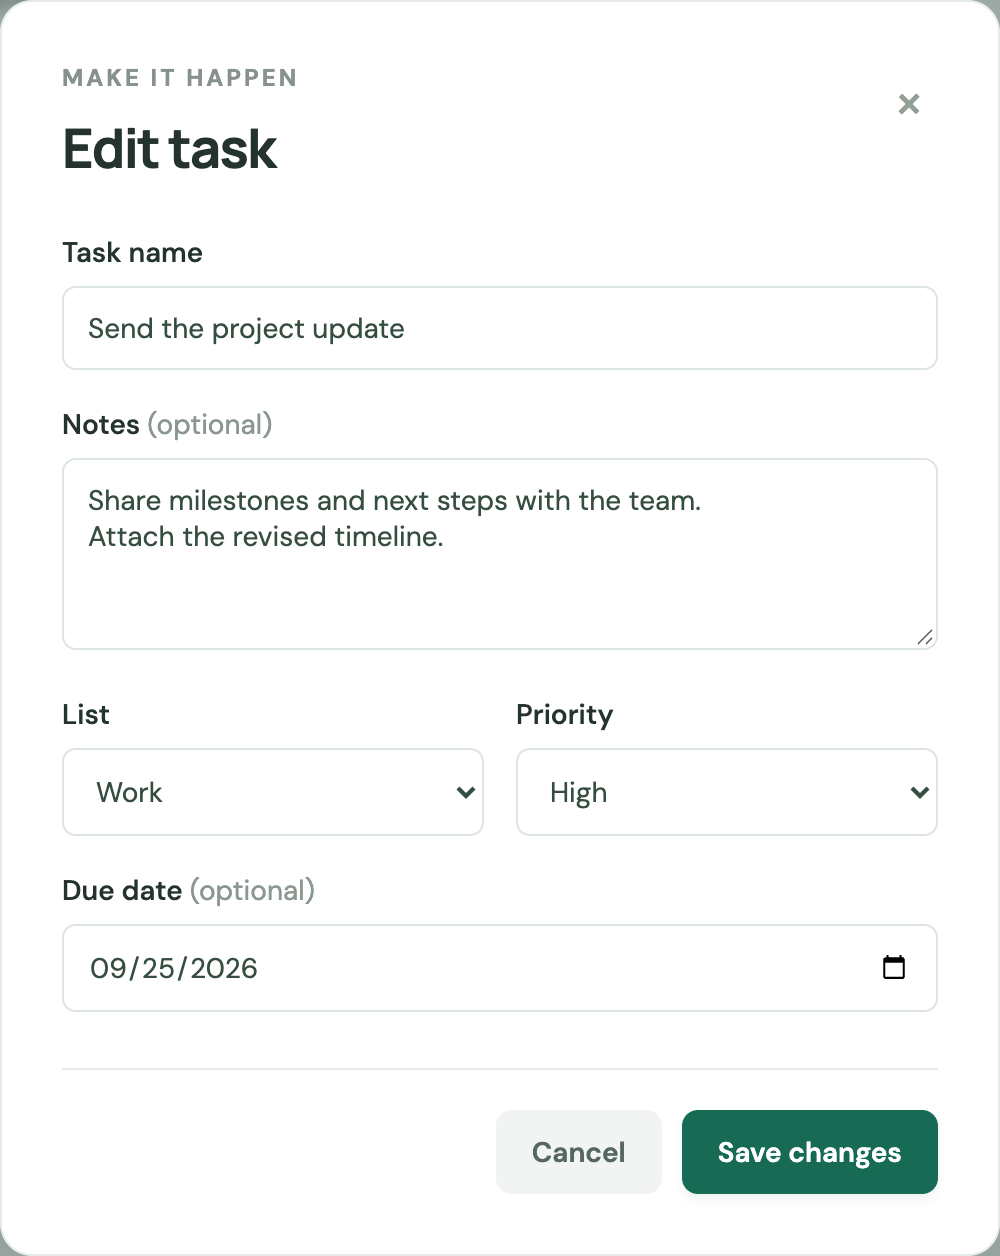
Edit task shows the current values and a Save changes button. Select image to enlarge.
Save or cancel
Select Save changes to keep your edits, or Cancel / × / Escape to discard them. A successful save shows Task updated. If you move a task to another list or change its date or priority, it may no longer match the current view or filter.
Read longer notes
Rows show up to two lines of notes. Open the editor to read or change the full text. Notes are plain text: line breaks are preserved, and a pasted link is displayed as text rather than a dedicated clickable link.
Timing logs use 30 fps, with zero-based start frames included and end frames excluded.
Open a list
Select Personal, Work, or Ideas under MY LISTS. The selected list is highlighted. On a narrow screen, swipe the horizontal navigation to reveal more list buttons.
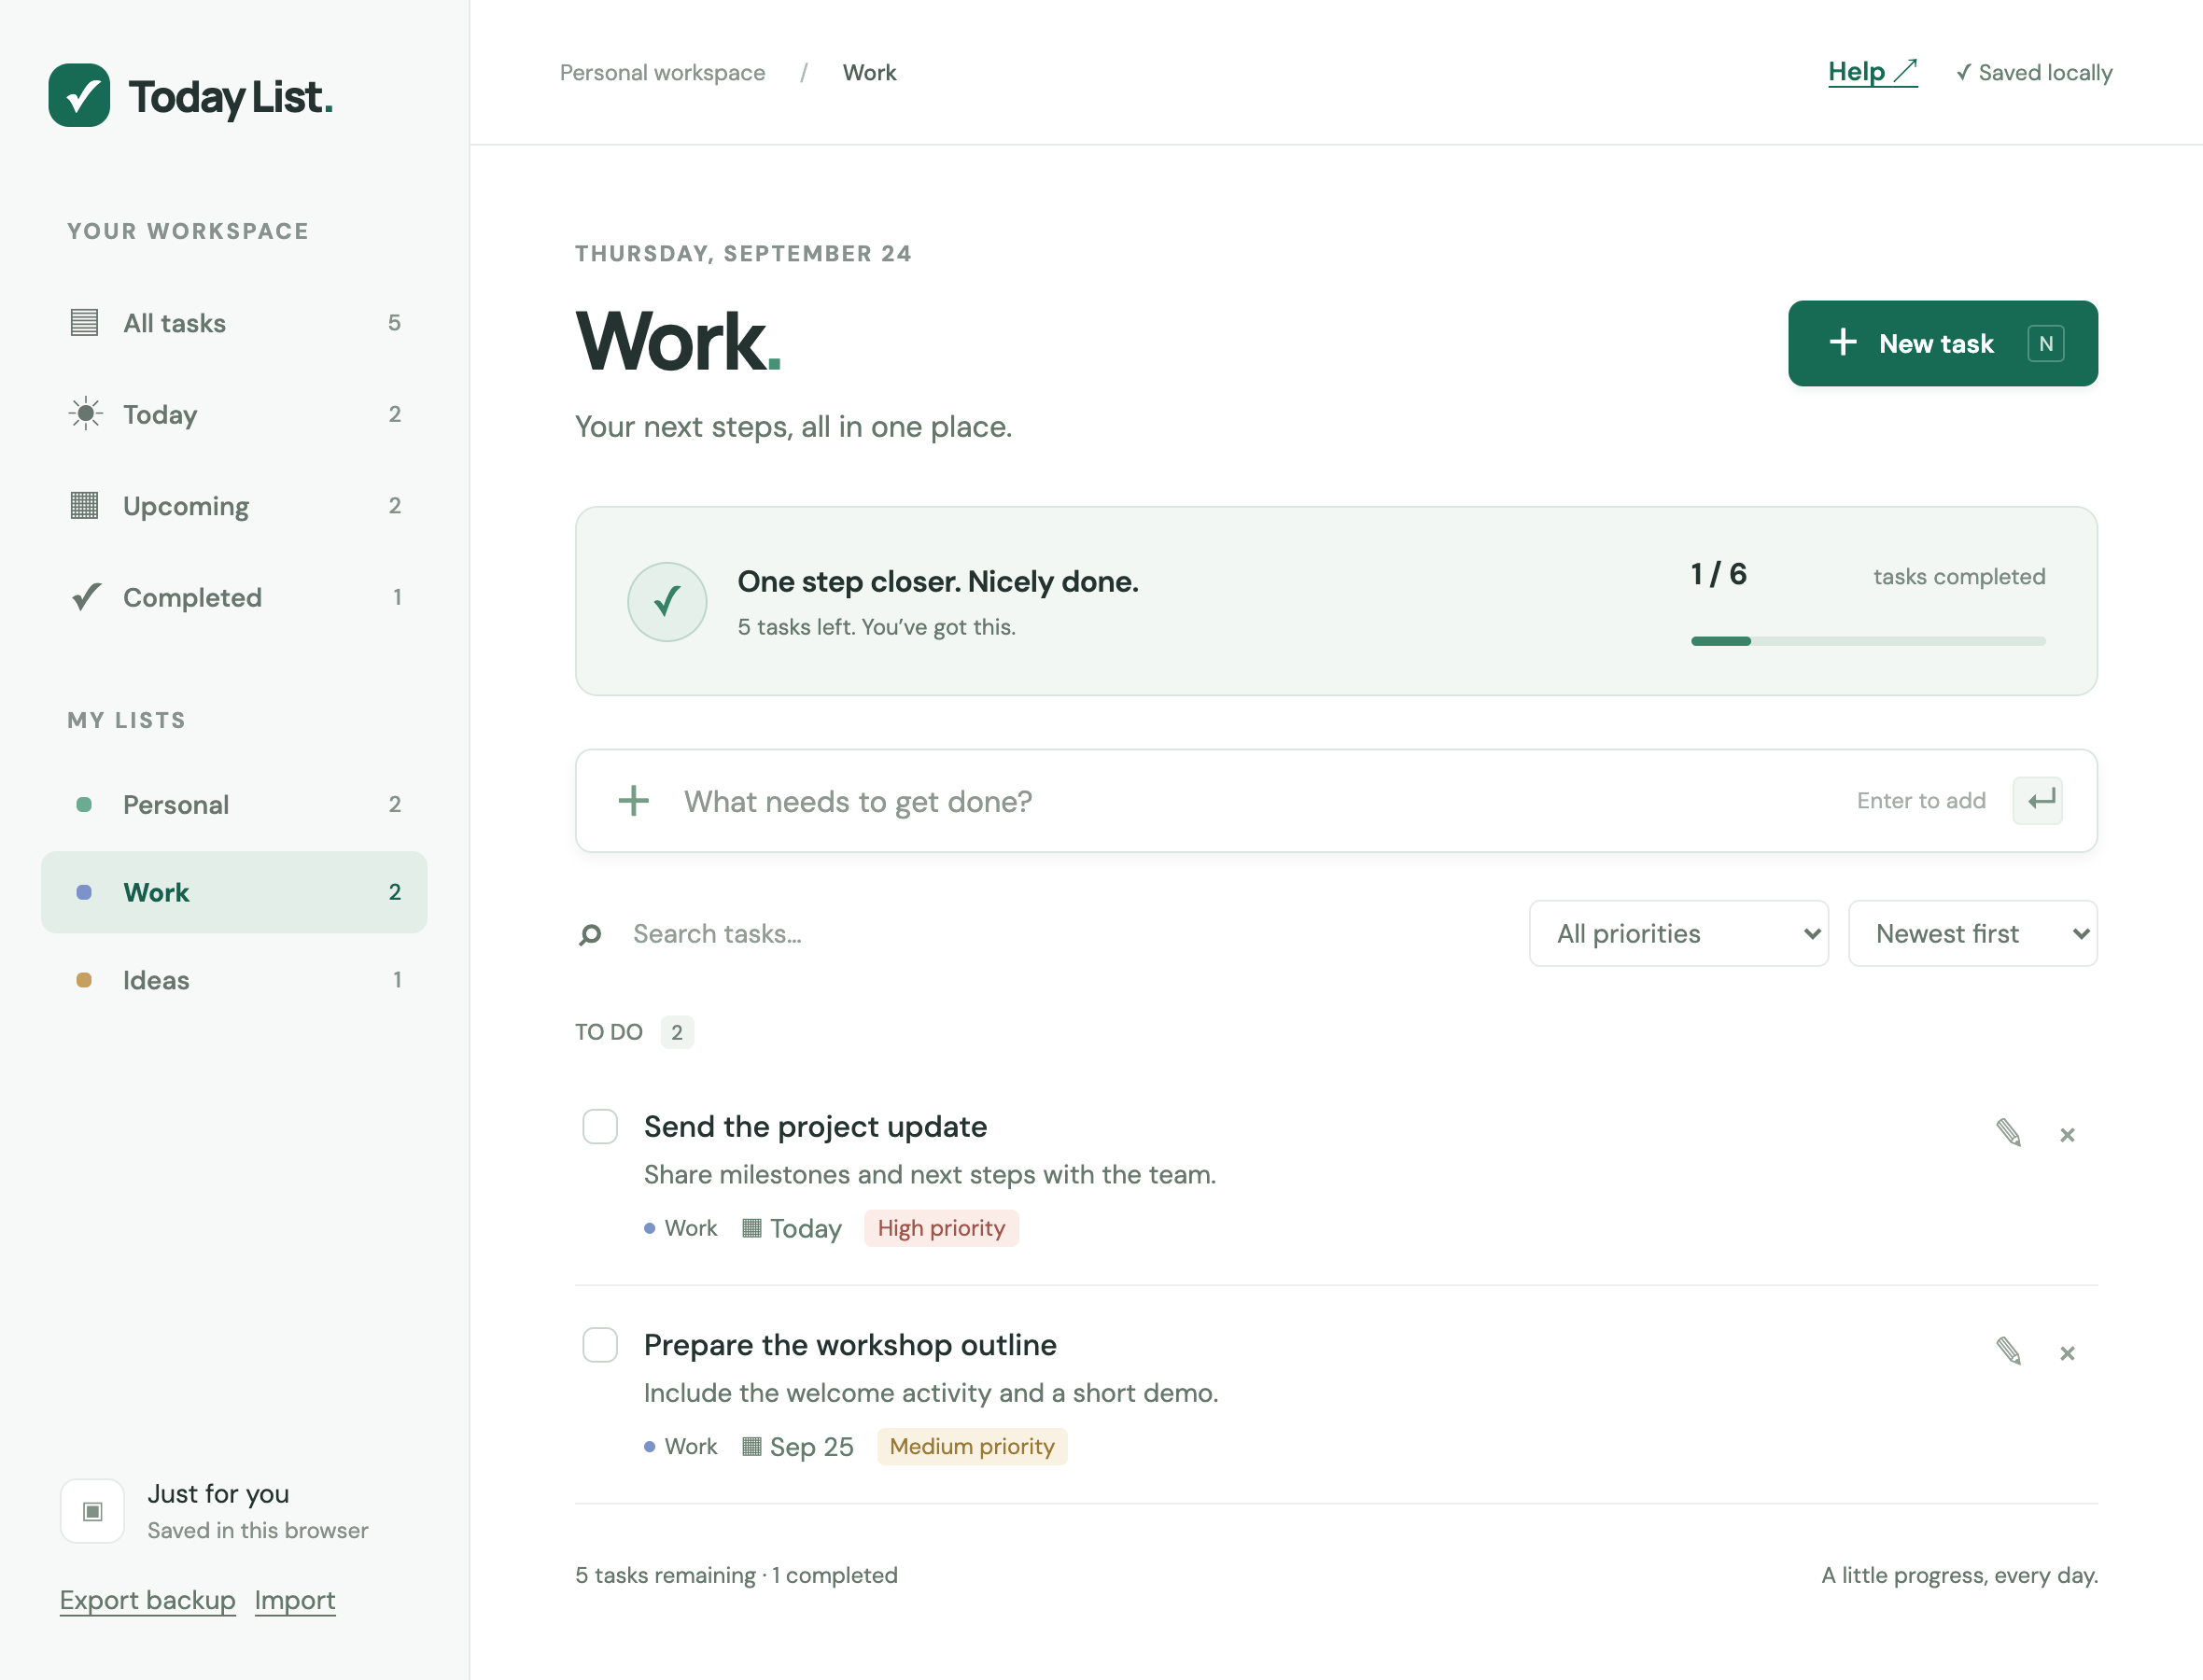
The Work list shows tasks assigned to Work. Select image to enlarge.
Create directly in that list
While viewing a list, use quick add or New task. The new task inherits that list. In the full editor you can change List before creating it.
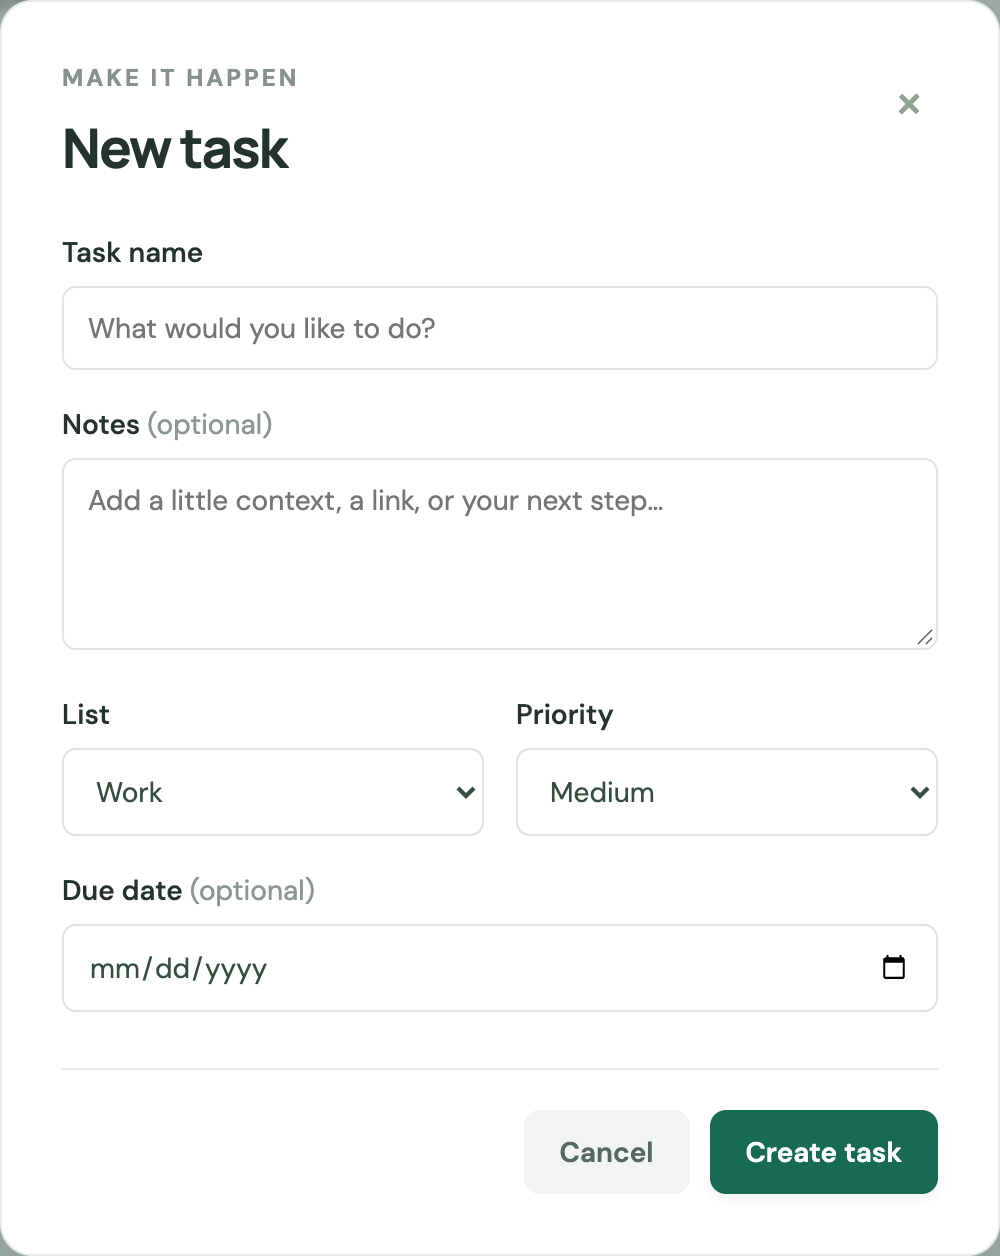
Opening New task from Work preselects Work. Select image to enlarge.
Move an existing task
Open the task editor, change List, and select Save changes. Open the destination list to confirm the move. A task can belong to only one list at a time.
Timing logs use 30 fps, with zero-based start frames included and end frames excluded.
Select Today
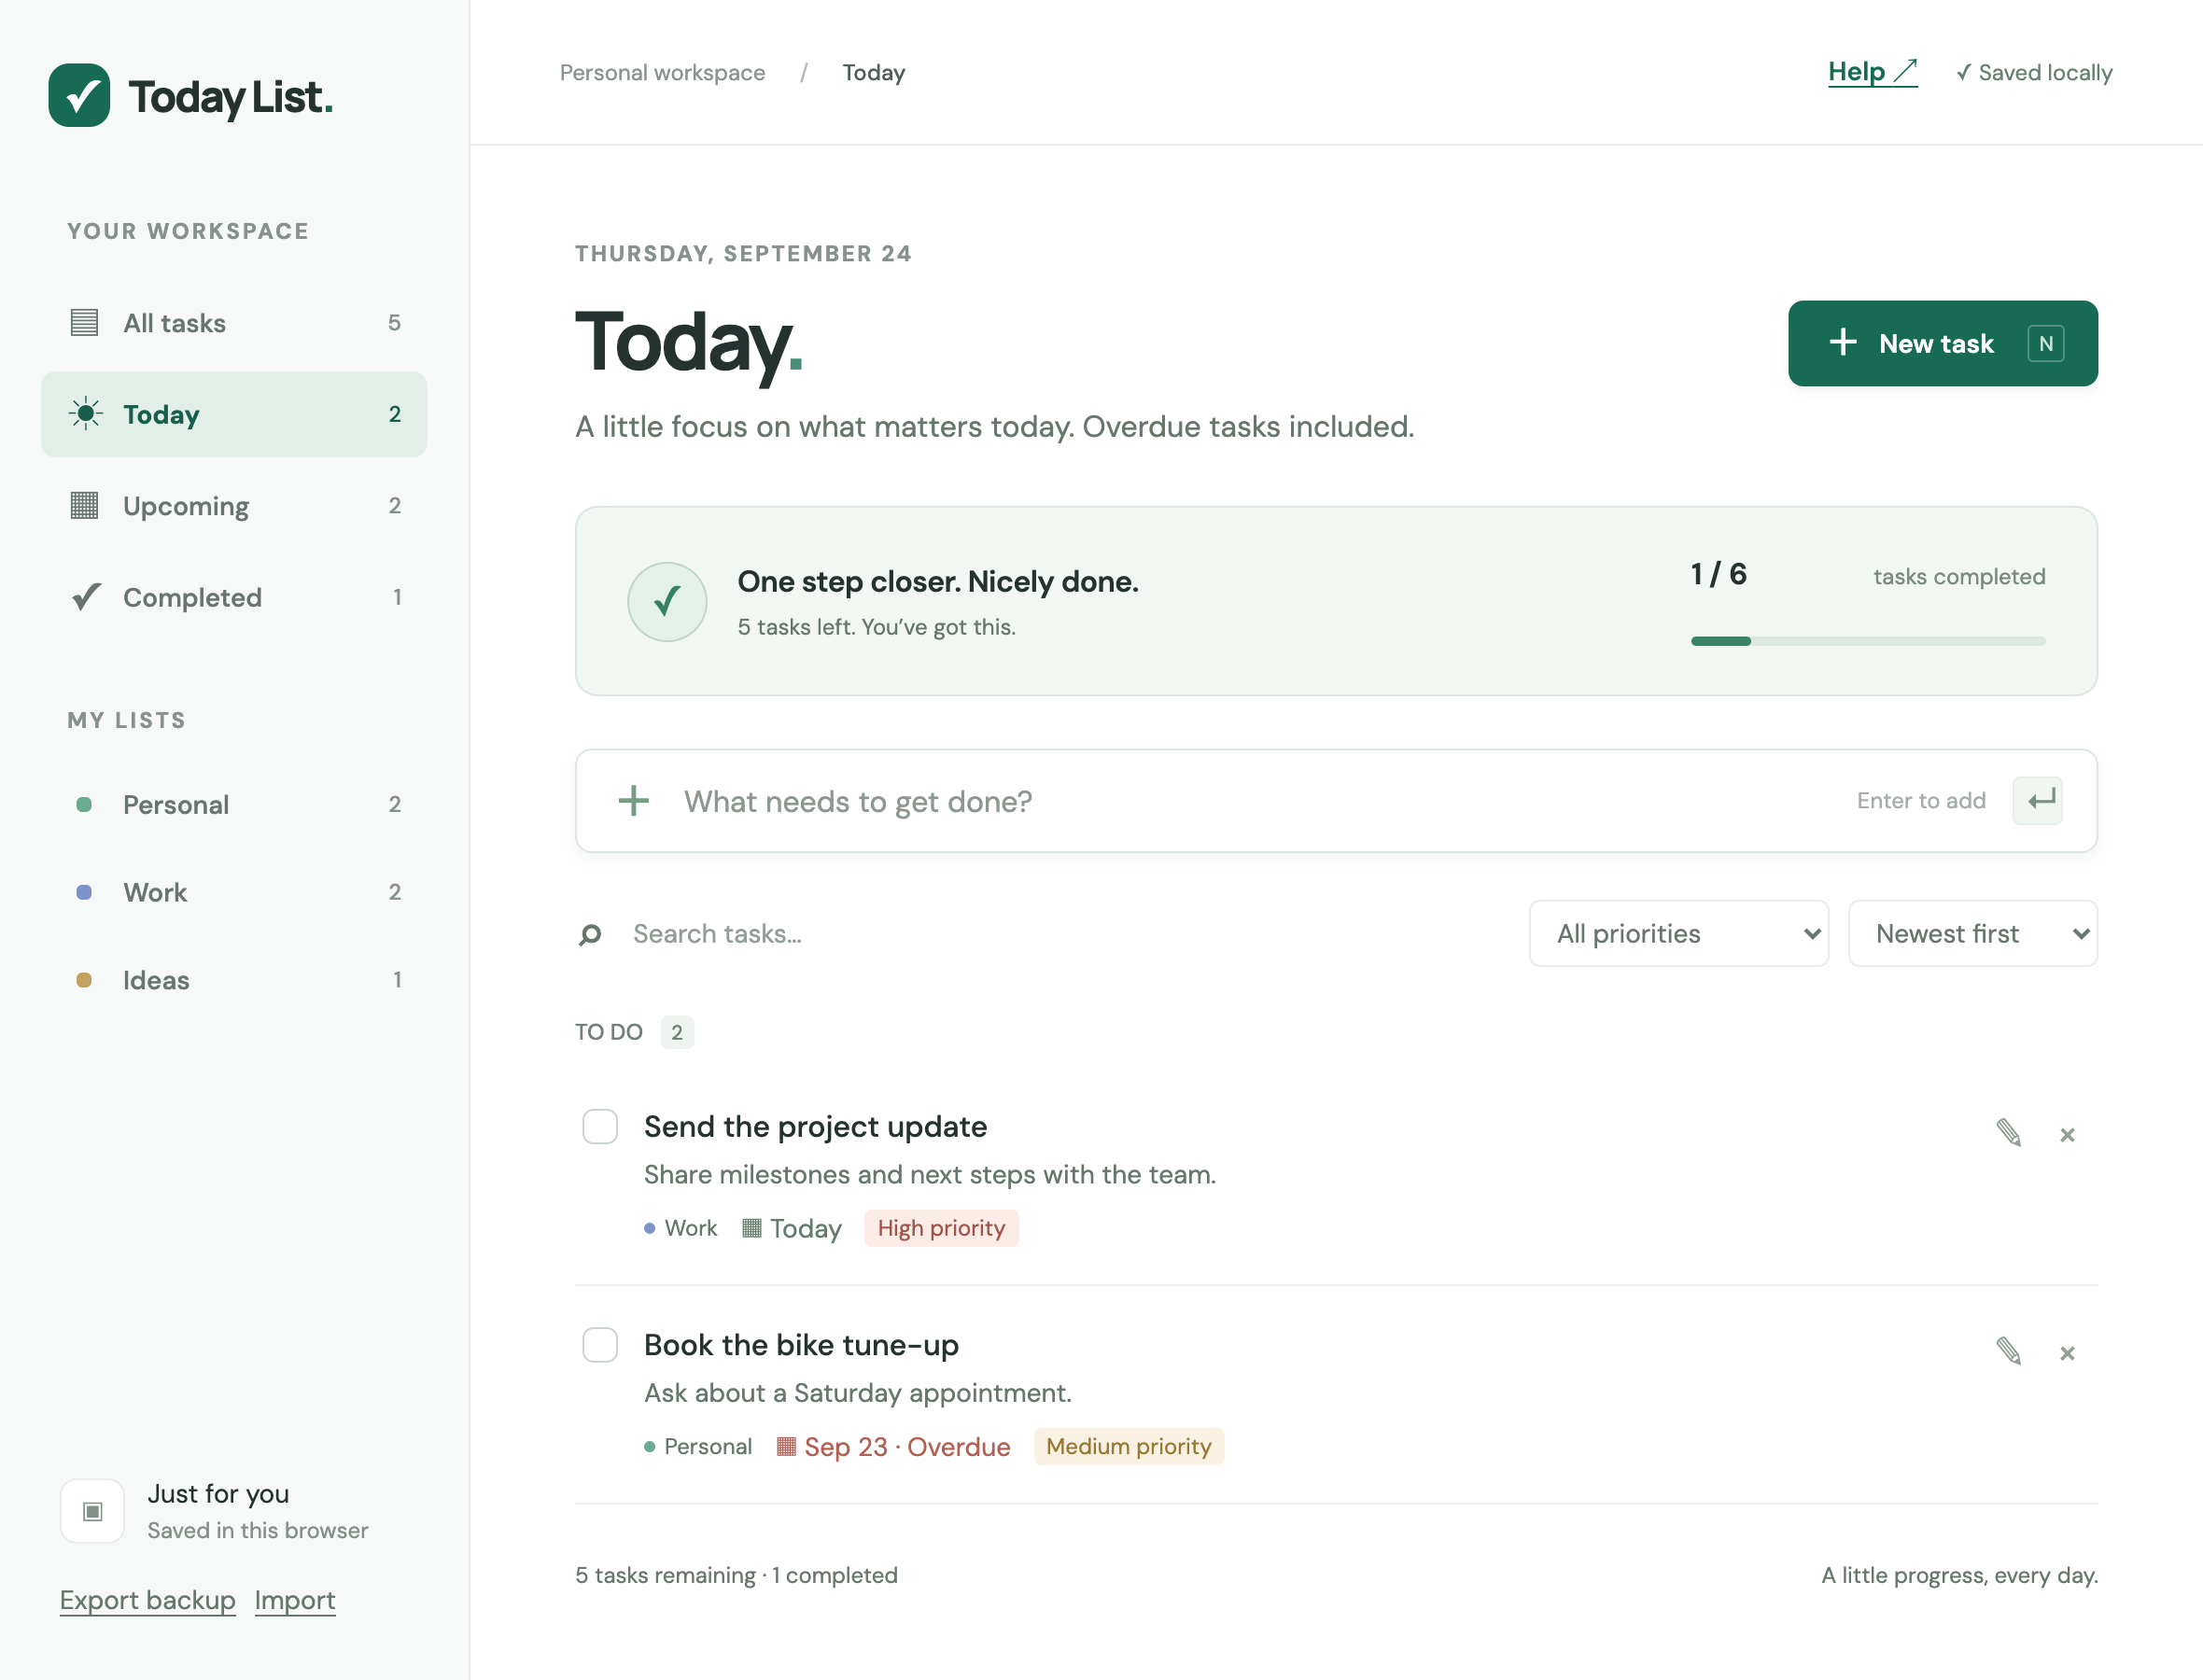
Choose Today in the navigation. Tasks due today display Today; unfinished tasks with an earlier due date show their date and an Overdue label.
Today includes a task due today and a bike appointment task that is overdue. Select image to enlarge.
Add a task for today
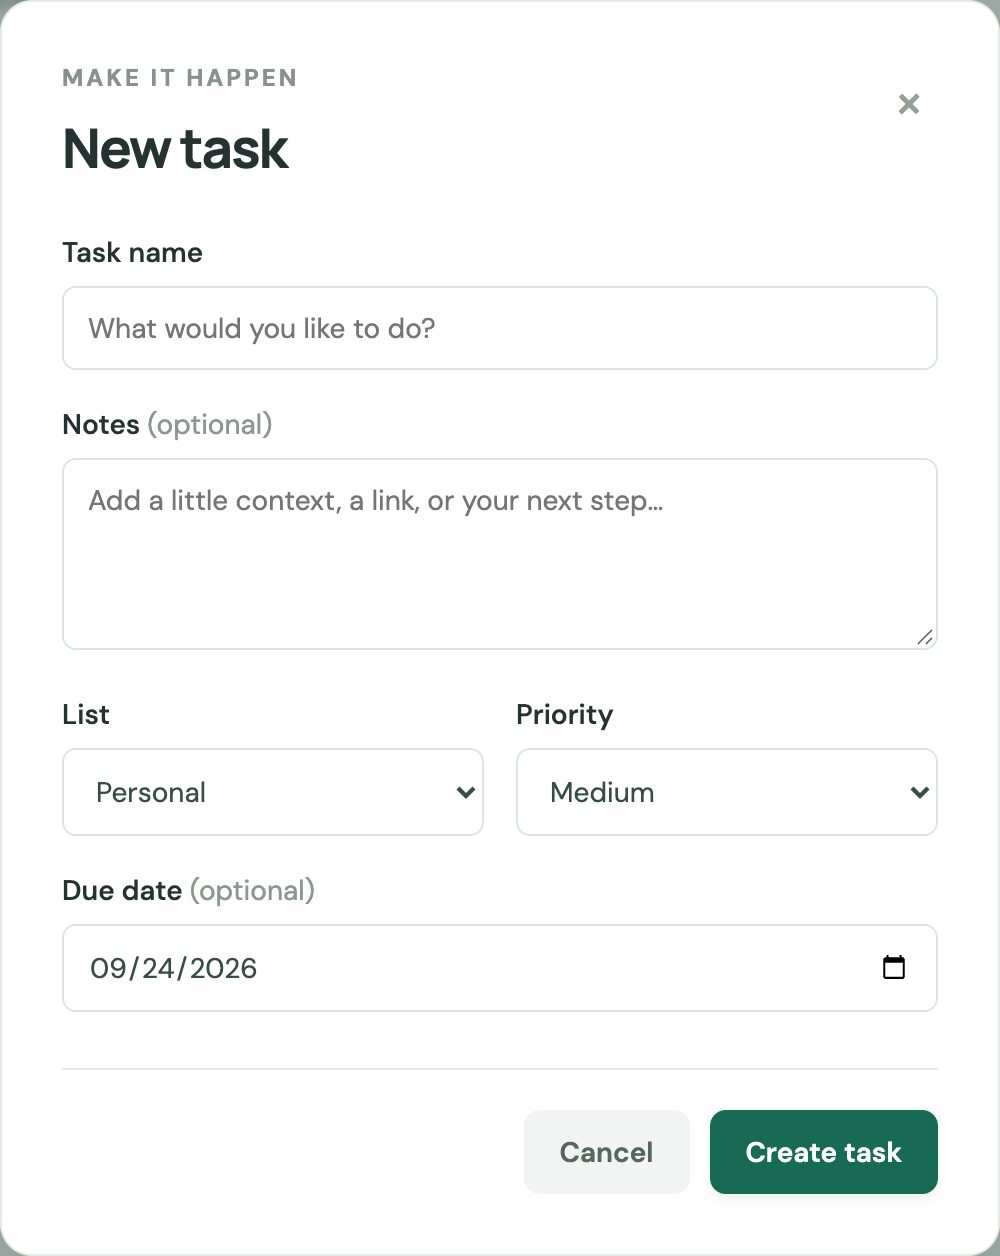
Use quick add to create a task due today, or select New task and review the prefilled Due date. You can change that date before saving.
New task opened from Today preselects the current date. Select image to enlarge.
Resolve an overdue task
Check its box if it is done. To reschedule it, open its editor, set a new Due date, and save. A future date moves the unfinished task to Upcoming; clearing the date removes it from Today.
Understand an empty view
Your day is looking clear means no incomplete tasks are due today or overdue, unless a search or priority filter is hiding them. Undated tasks still exist in All tasks and their named lists.
Timing logs use 30 fps, with zero-based start frames included and end frames excluded.
Select Upcoming
Open Upcoming in the navigation to see future dated tasks. Choose Due date in the sort control if you want the nearest deadlines first.
Upcoming contains future tasks only; today and overdue tasks are excluded. Select image to enlarge.
Create a future task
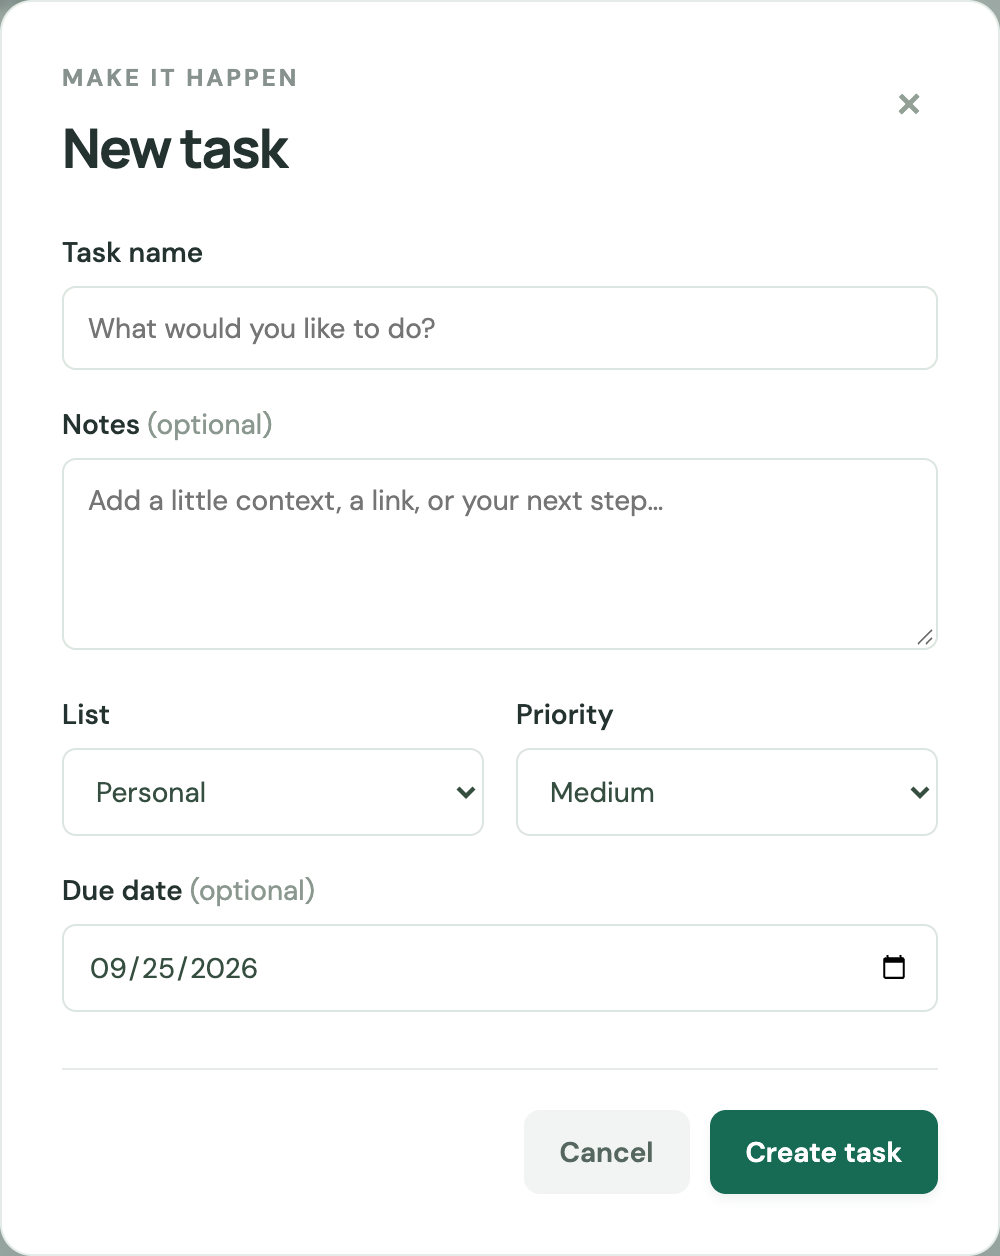
Use quick add for a task due tomorrow, or open New task to choose a specific future date. The editor defaults to tomorrow when opened from Upcoming.
Tomorrow is preselected; change Due date before creating a task for another day. Select image to enlarge.
Change the schedule
Edit a task and select a different date, then Save changes. A date of today or earlier moves an incomplete task to Today. Removing its date leaves it in All tasks and its list.
Review work as dates arrive
When the local date advances, a future task becomes eligible for Today. Return to the tab, change views, or reload to refresh the display.
Timing logs use 30 fps, with zero-based start frames included and end frames excluded.
Complete a task
Select the empty checkbox to the left of the task name. After saving, the task name is struck through. In All tasks and a named list, it moves to the COMPLETED section; in Today or Upcoming, it disappears from that view.
A completion notification includes a temporary Undo button. Select image to enlarge.
Review finished work
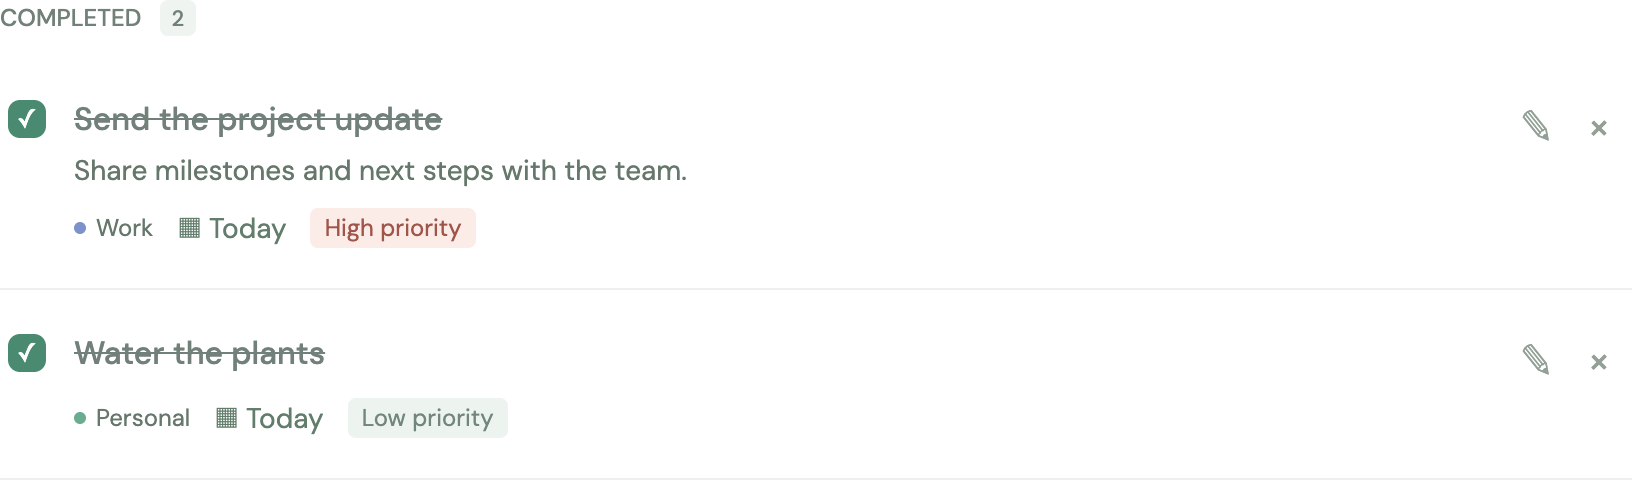
Select Completed in the navigation. All completed tasks appear here, subject to the current search and priority filter.
Checked boxes and struck-through titles identify completed tasks. Select image to enlarge.
Reopen a task
Uncheck its box. The task becomes incomplete with its existing name, notes, list, priority, and due date. It disappears from Completed; find it in All tasks, its named list, or the matching date view.
Undo an accidental status change
Select Undo in the notification within 12 seconds to restore the prior completion status. Both completing and reopening offer Undo. Later, you can still change status manually using the checkbox.
Timing logs use 30 fps, with zero-based start frames included and end frames excluded.
Choose the correct task
Locate the task and read its title. If several tasks share a name, use the list, notes, and due date to identify the intended row.
Select the row delete button
Select the × at the far right of the task row, next to the pencil icon. This is the task delete control, not the × used to close an editor or notification. The app does not ask for a second confirmation.
Undo promptly if needed
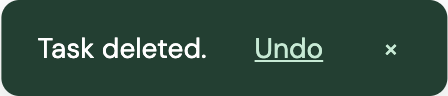
The Task deleted notification includes Undo for 12 seconds. Select it to restore the deleted task and its details.
Select Undo in the deletion notification before it disappears. Select image to enlarge.
Recover after Undo expires
There is no trash folder. If you have a backup containing the task, import it to restore missing task IDs. Existing IDs are kept, so importing does not roll back other tasks. Without Undo or a backup, the deleted task cannot be restored by the app.
Timing logs use 30 fps, with zero-based start frames included and end frames excluded.
Choose the search scope
Select All tasks to search incomplete and completed tasks across every list. Select a named list, Today, Upcoming, or Completed to narrow the scope first.
Enter a word or phrase
Type in Search tasks. Matching is case-insensitive and looks for the literal text you entered anywhere in the combined name, notes, and list text. Surrounding search spaces are ignored.
Searching for milestones finds text stored in notes. Select image to enlarge.
Review the matching rows
The example finds Send the project update because its notes contain milestones. Priority filtering can narrow these results further. Dates and priority labels are not searchable fields.
A notes match returns the corresponding task row. Select image to enlarge.
Reset a search with no matches
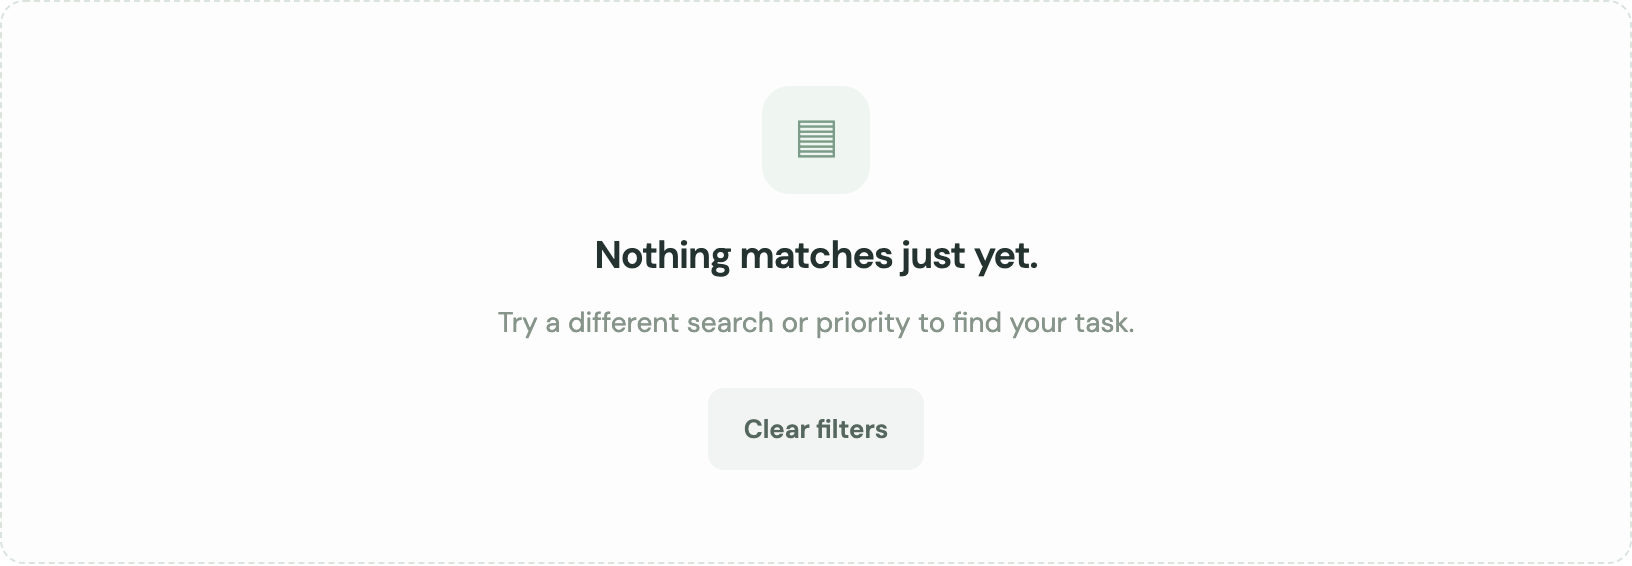
If Nothing matches just yet appears, select Clear filters to empty the search and reset priority to All priorities. Or manually clear Search tasks and choose All priorities.
Clear filters resets both search and priority filtering. Select image to enlarge.
Timing logs use 30 fps, with zero-based start frames included and end frames excluded.
Assign a priority
Open a task or select New task. Choose High, Medium, or Low in the Priority field, then select Save changes or Create task. Quick-added tasks start at Medium.
Filter the visible tasks
Open All priorities above the task list and choose High priority, Medium priority, or Low priority.
High priority filters the current view to high-priority tasks. Select image to enlarge.
Read the result
Only tasks matching the chosen priority, current view, and search remain visible. Priority badges include text, so you do not need to rely on color alone.
The High priority badge identifies the matching task. Select image to enlarge.
Return to every priority
Choose All priorities. If there are no results, Clear filters resets both priority and search. Selecting a different navigation view also resets both.
Timing logs use 30 fps, with zero-based start frames included and end frames excluded.
Choose a view and filters
Select the tasks you want to examine. Sorting works on the results of the current view, search, and priority filter.
Select an ordering
Choose Newest first for creation time descending; Due date for earliest dates first with undated tasks last; Priority for High, then Medium, then Low; or A–Z for alphabetical task names.
Due date is selected in the sort control. Select image to enlarge.
Read each section separately
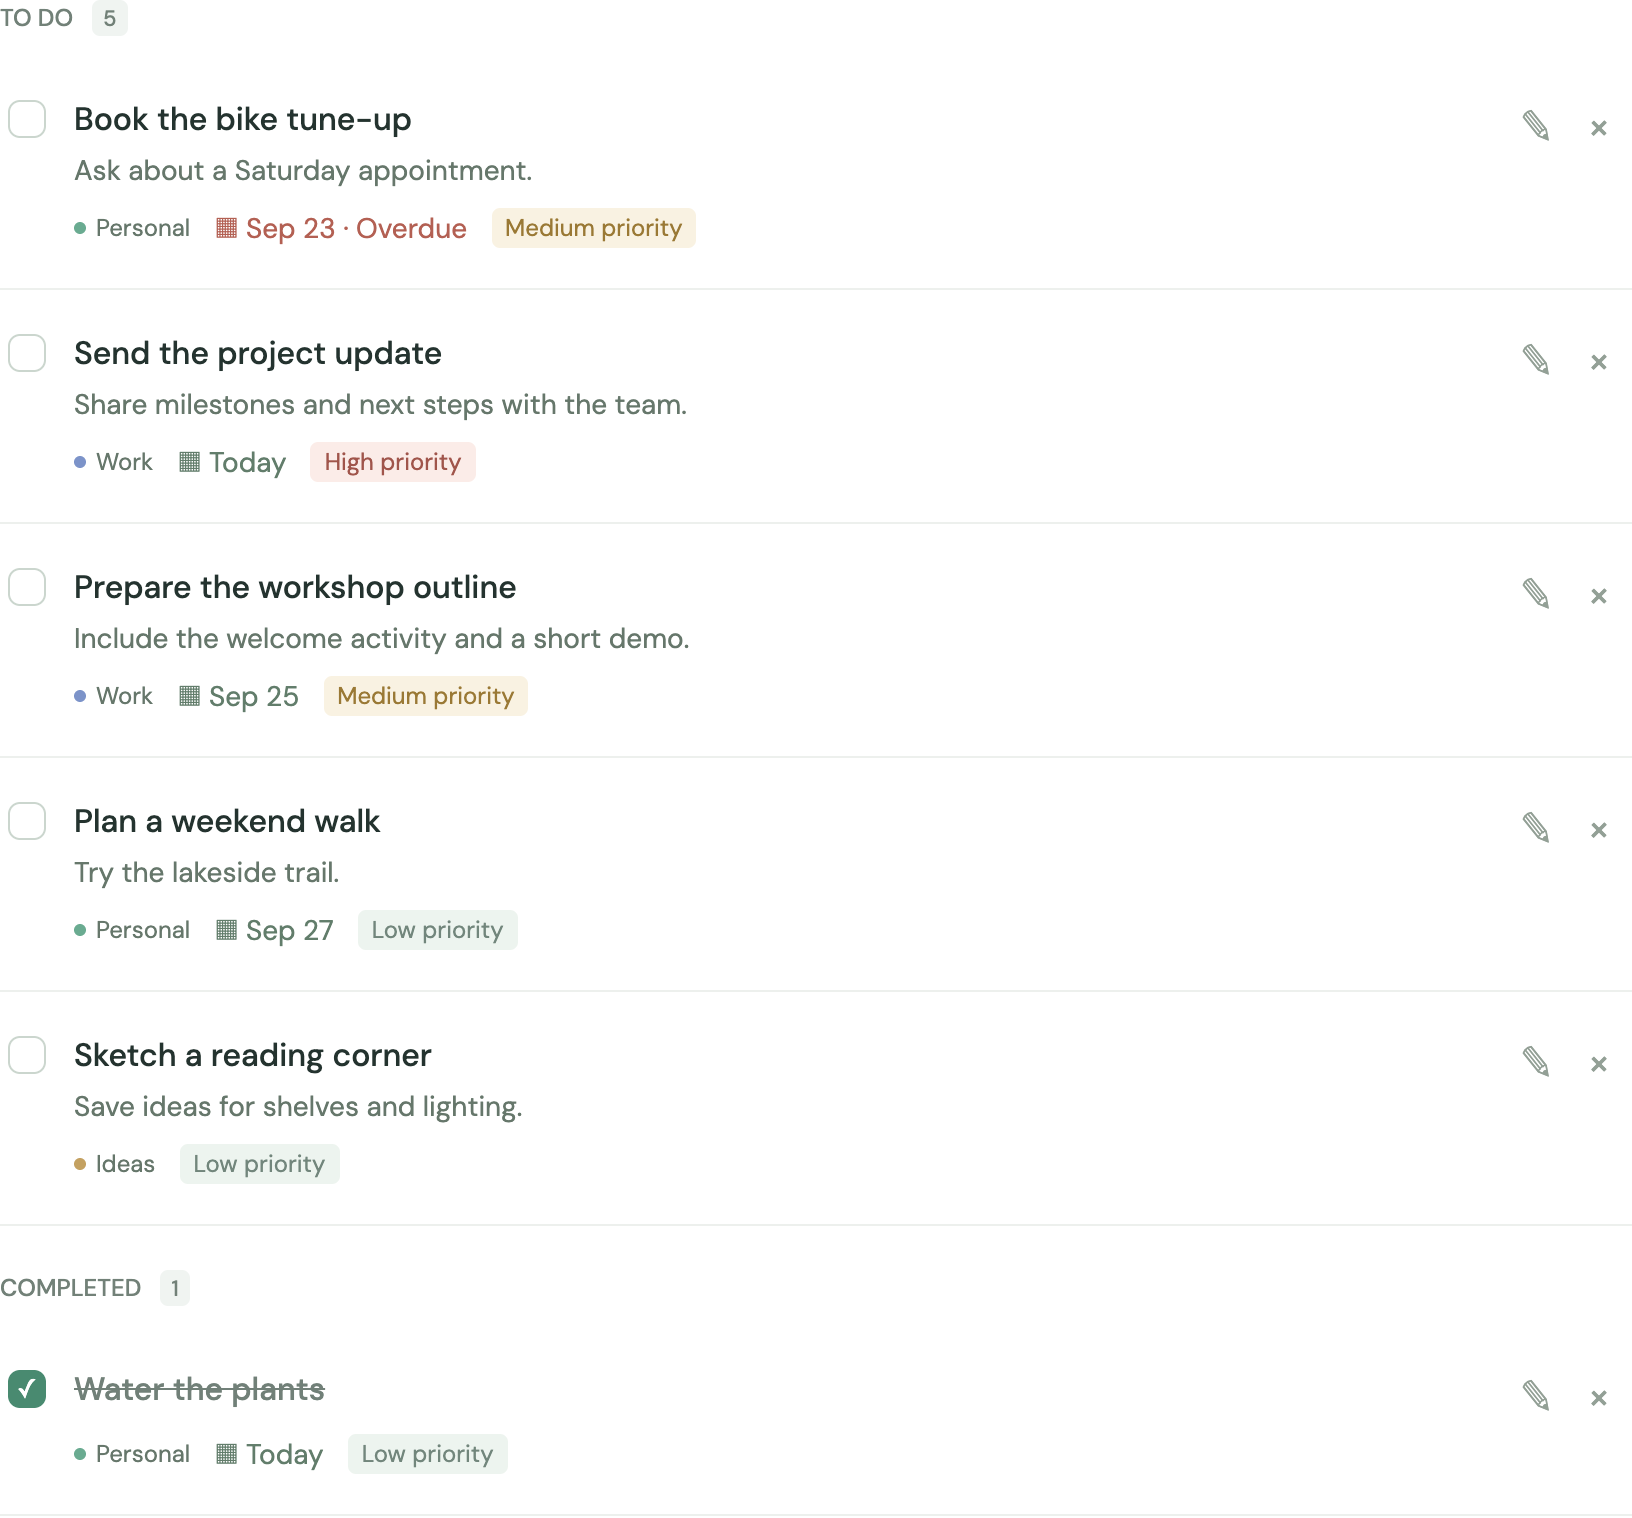
TO DO and COMPLETED remain separate sections. Sorting applies within each section, so completed tasks do not move into the TO DO section when their date or priority is higher.
The overdue task comes before later dates; the undated idea follows dated tasks. Select image to enlarge.
Change the order whenever needed
Choose a different sort option. Your selected order carries across navigation views during the current page session. Reloading starts again at Newest first.
Timing logs use 30 fps, with zero-based start frames included and end frames excluded.
Read the fraction
The first number is completed tasks; the second is all saved tasks. For example, 1 / 6 means one complete task out of six total. The progress bar represents the same fraction.
Workspace-wide progress: 1 completed task out of 6 saved tasks. Select image to enlarge.
Read the remaining count
The panel message and bottom footer count incomplete tasks across the whole workspace. Completing, reopening, creating, deleting, or importing tasks can change these totals.
Compare navigation and section badges
All tasks counts incomplete tasks. Today and Upcoming count incomplete tasks meeting their date rules. Personal, Work, and Ideas count incomplete tasks in that list. Completed counts completed tasks. The TO DO and COMPLETED section headings count only the visible rows after filters.
Interpret all-done and empty states
All done appears when there are tasks and all are complete. An empty workspace instead invites you to add your first task. A clear Today view alone does not mean all tasks in other views are complete.
Timing logs use 30 fps, with zero-based start frames included and end frames excluded.
Find Export backup
On desktop, look at the bottom of the left sidebar. On mobile, scroll below the task list to the backup controls.
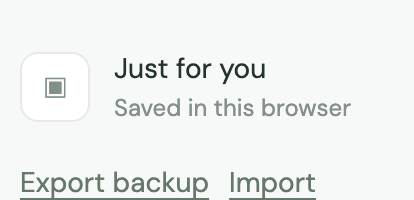
Desktop backup controls are under Saved in this browser. Select image to enlarge.
Download the backup
Select Export backup. Your browser downloads a file named today-list-YYYY-MM-DD.json, using the current local date. The backup contains all saved tasks, including completed tasks, regardless of the current view, search, or filter.
The app reports that the backup download was initiated. Select image to enlarge.
Check and store the file
Check the browser download list or download folder to confirm the file was actually saved. Keep a copy somewhere you can find later. If the browser asks for a destination, choose one and finish saving.
Use the backup on another browser or device
Open Today List at the intended address in the destination browser, transfer the file there, and follow Import a backup. Export creates a snapshot; it does not set up ongoing sync.
Timing logs use 30 fps, with zero-based start frames included and end frames excluded.
Choose the backup file
Select Import at the bottom of the desktop sidebar, or Import backup below the task list on mobile. In the browser file chooser, select a previously exported Today List .json file. Canceling the file chooser makes no changes.
Select Import to open your browser file chooser; its appearance depends on your device. Select image to enlarge.
Check the import result
After validation and a successful save, a message reports how many tasks were imported. Existing tasks remain. There is no preview or second confirmation screen.
A successful merge reports the number of tasks added. Select image to enlarge.
Find imported tasks
Select All tasks and clear any search or priority filter. Imported tasks retain their original list, due date, priority, notes, completion status, and creation time, so they may not appear first under Newest first.
The example backup added a new community garden task. Select image to enlarge.
Understand duplicates
If a task ID already exists, the imported version is skipped, even if its title or notes are different. Importing the same backup again does not create duplicates. Tasks with different IDs can have the same title and both will be kept.
When every imported ID already exists, the app reports that the tasks are already in your list. Select image to enlarge.
Timing logs use 30 fps, with zero-based start frames included and end frames excluded.
Check the save status
Look for Saved locally in the top bar after a successful action. Reloading the same site in the same browser restores saved tasks. A new task or edited row should only be treated as saved after the action succeeds.
Keep using the same browser and site address
Storage belongs to the browser profile and exact site origin (protocol, host, and port). A local preview, a published address, a different port, and another browser can each have separate task collections.
Use tabs with care
Open tabs on the same site in the same browser normally pick up saved task changes through browser storage events. An editor already open in another tab can still contain older text; close and reopen it before editing after a change elsewhere.
Move data deliberately
Export a backup from the original browser. Open the destination site/browser and import that file. Verify the tasks are present before removing the original data.
Timing logs use 30 fps, with zero-based start frames included and end frames excluded.
If a task seems missing
Select All tasks in the navigation to clear search and priority filters. Check Completed and the other named lists. Confirm that you are using the same browser profile and site address. Date views exclude undated tasks, and Today/Upcoming exclude completed tasks.
If an import is rejected
For This file is not valid JSON, select an intact exported backup. For Choose a valid Today List backup, the file is not in the supported format or contains invalid task data. For the 5 MB message, select a smaller valid backup. Rejected imports do not change your tasks.
An invalid JSON file is rejected without changing saved tasks. Select image to enlarge.
If Storage needs attention appears
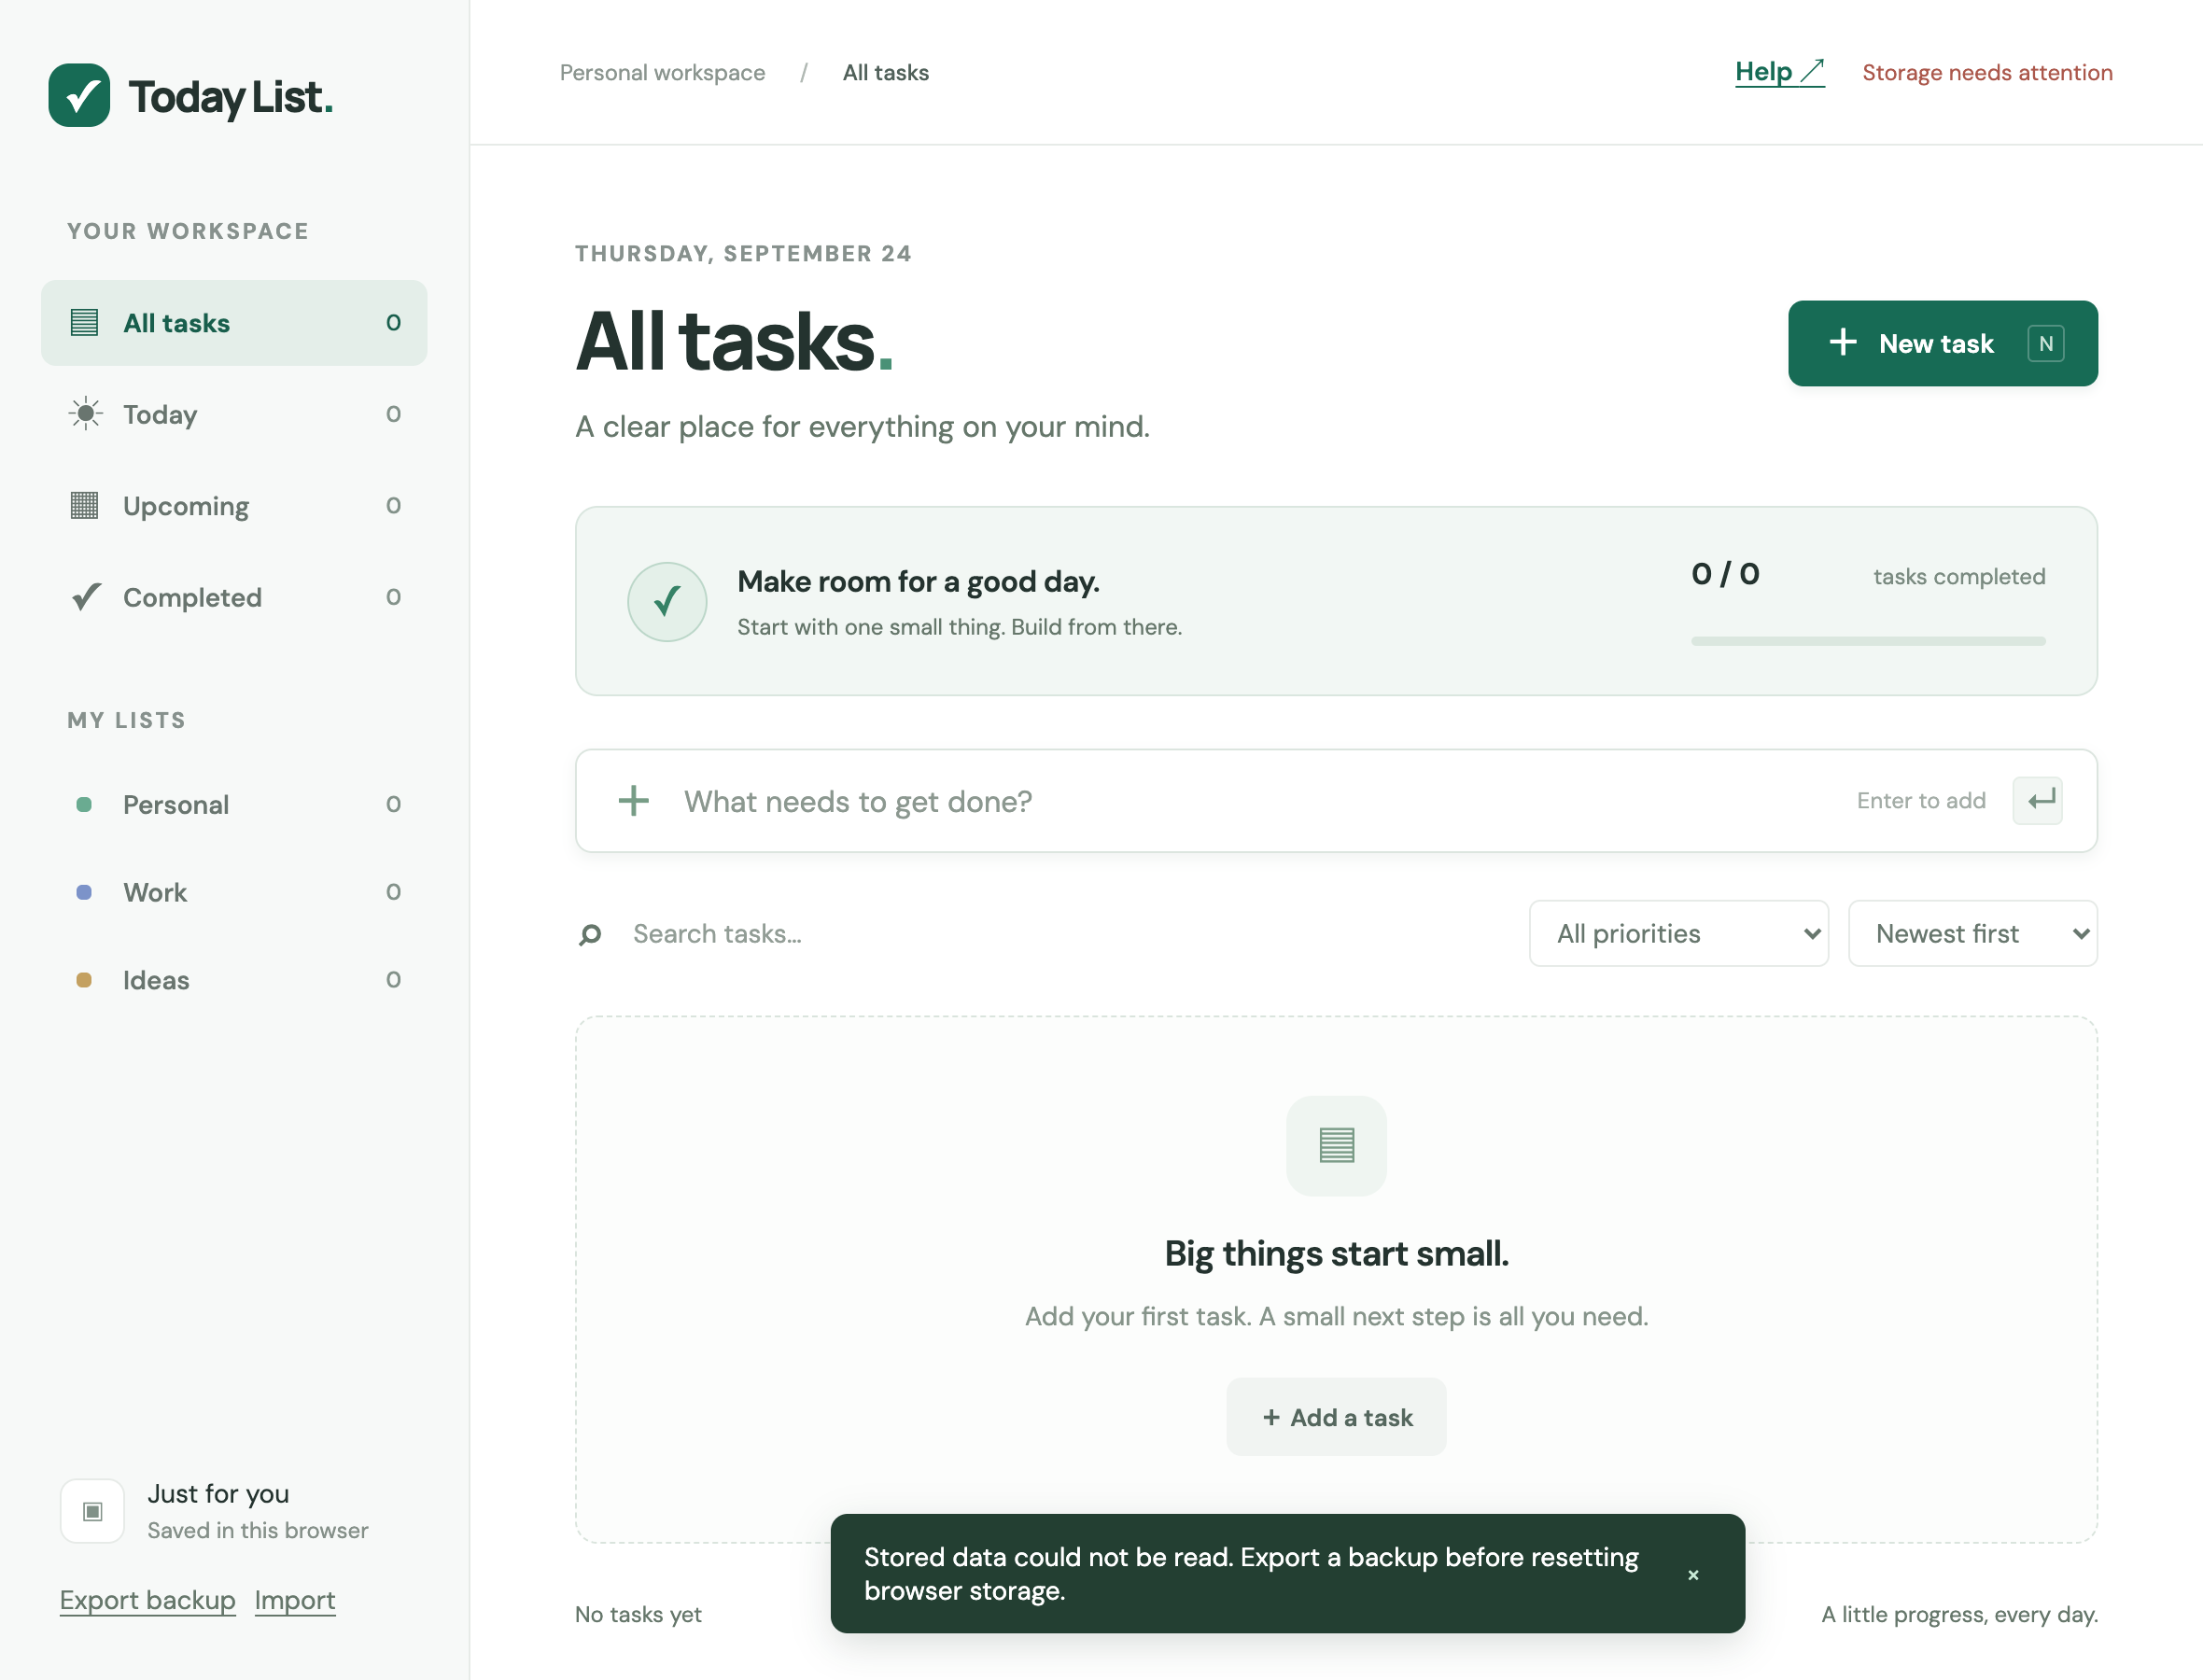
Stored task data could not be read or validated. Select Export backup first to preserve the raw content. Normal saving is blocked so the unreadable data is not overwritten. Keep the exported file; repair or technical help may be needed before it can be imported.
A storage-read problem is shown in the top bar and notification. Select image to enlarge.
If Unable to save appears
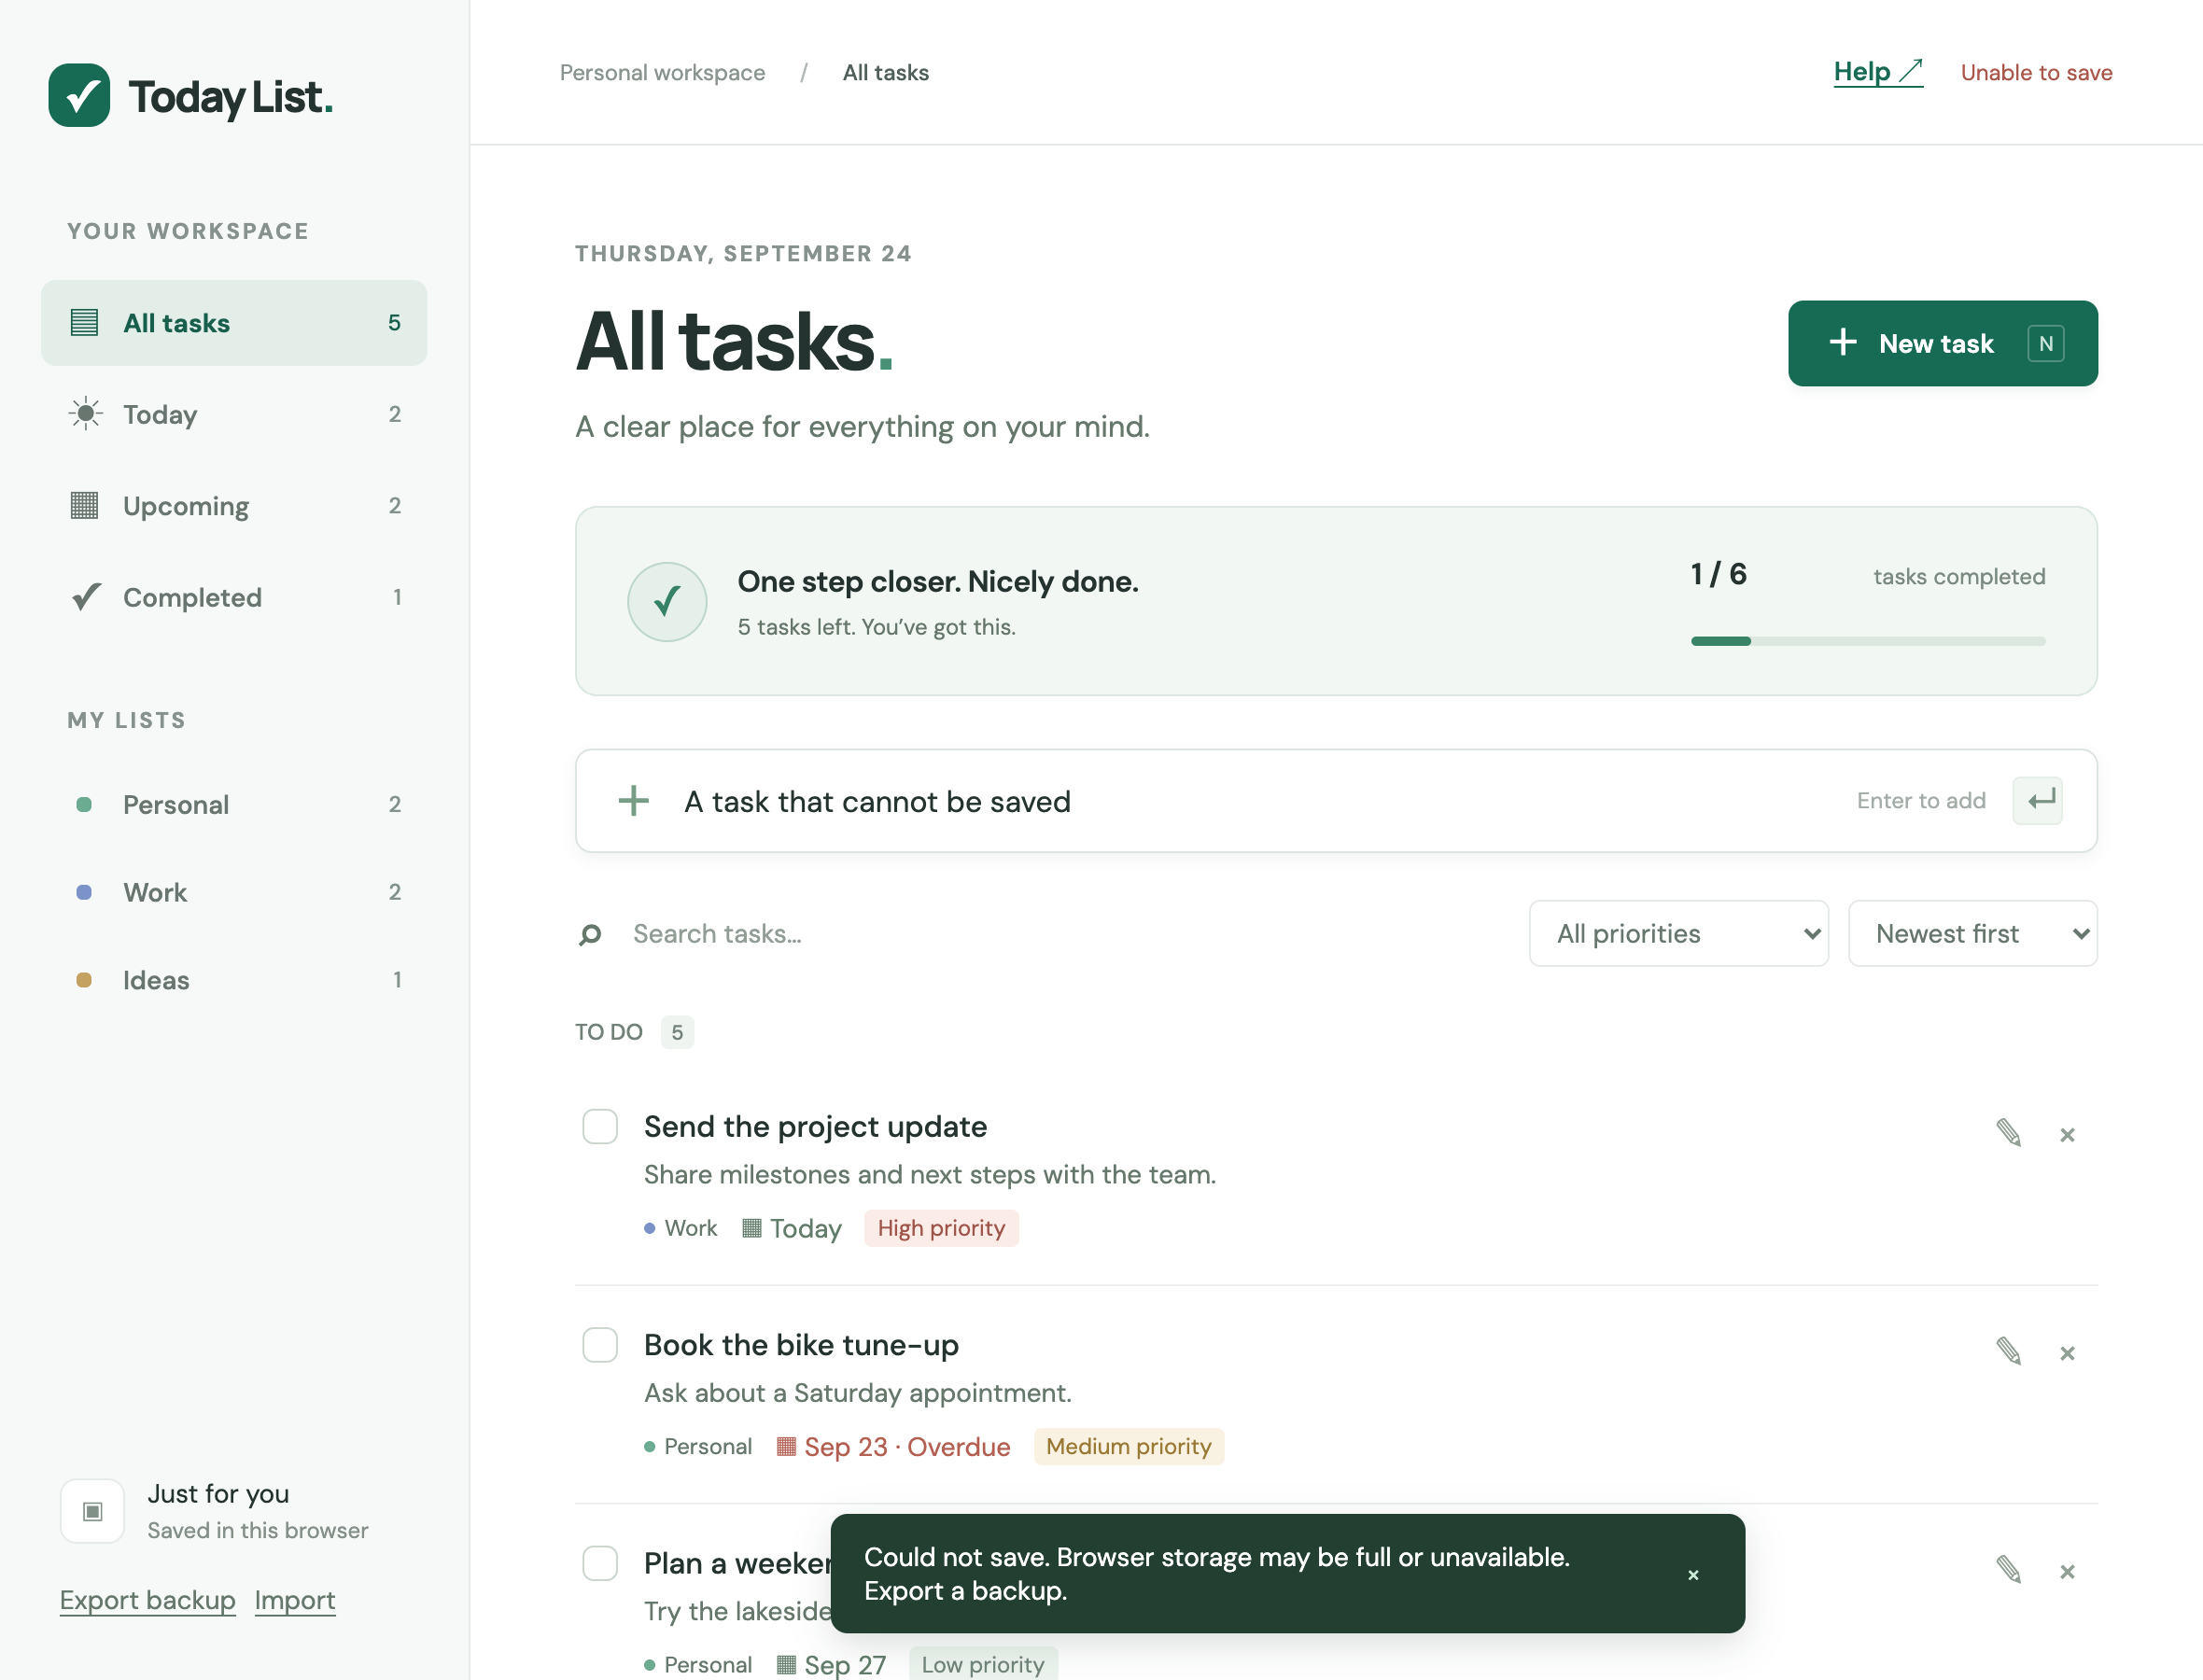
The browser may have blocked storage or run out of space. Export the currently saved tasks, keep any unsaved editor text separately, and check the browser storage/site settings. Free space or allow storage, then retry the failed action. The failed change was not saved.
A failed write leaves the previous saved tasks intact and displays an error. Select image to enlarge.
Reset only after preserving what you need
If you intentionally choose to start fresh, use your browser settings to clear this site's stored data, then reload Today List. This removes its saved tasks. Browser settings differ, and Today List has no in-app reset button. Import a known-good backup afterward; an unrepaired raw export may still be invalid.
Timing logs use 30 fps, with zero-based start frames included and end frames excluded.
Navigate horizontally
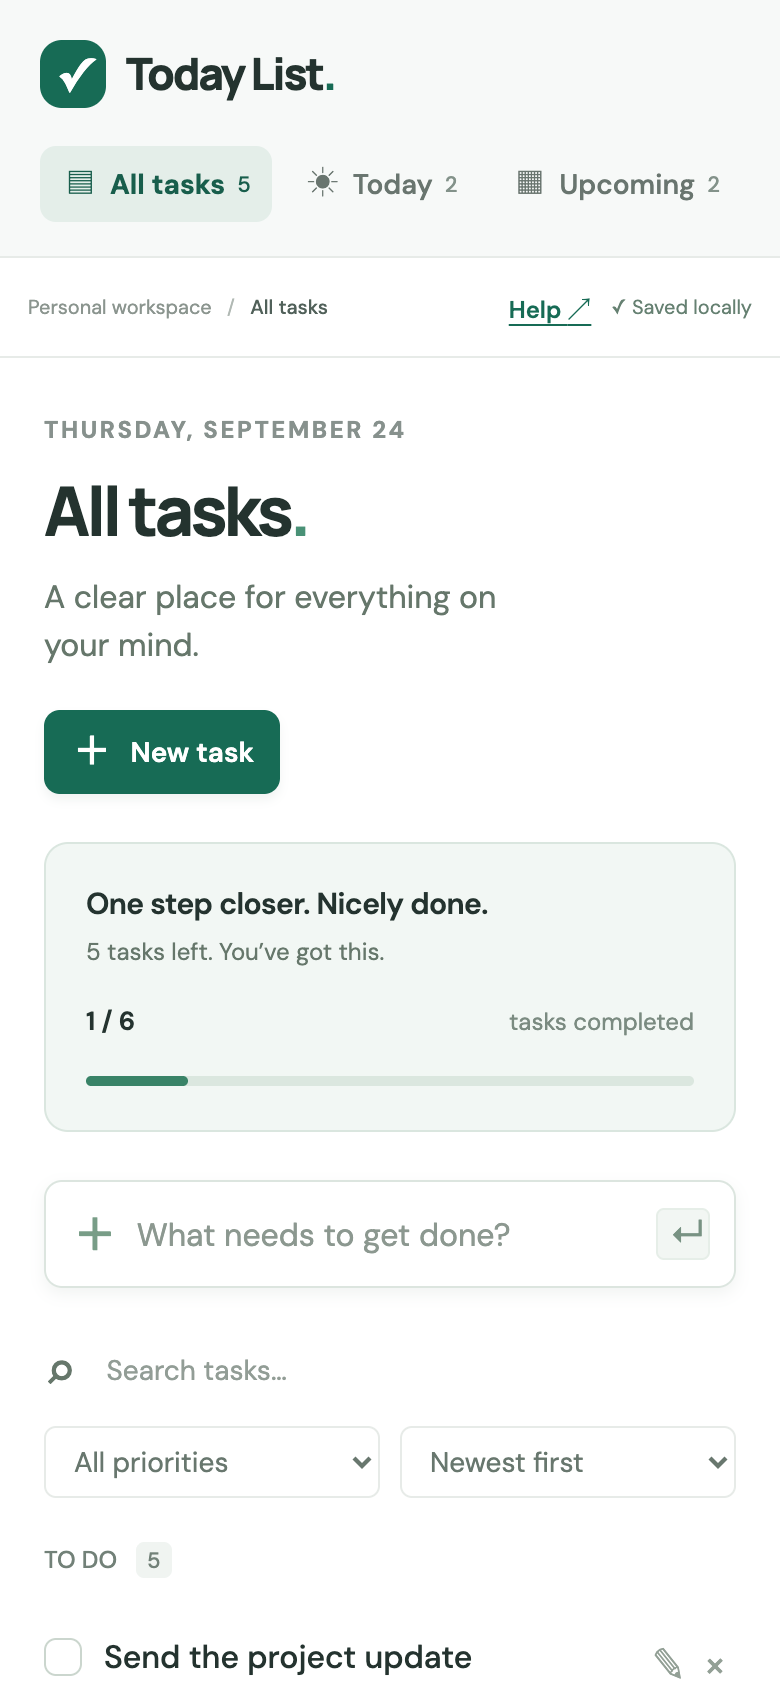
At narrow widths, the task views and lists appear in a horizontal row below the app name. Swipe or scroll that row sideways to reach Personal, Work, and Ideas. Select a view just as on desktop.
Mobile layout with horizontal navigation, New task, progress, and quick add. Select image to enlarge.
Create and edit tasks
Use New task or quick add. Tap a task title to edit it; the checkbox completes it. The editor may need vertical scrolling on a small screen to reach Create task or Save changes.
The full task editor fits a narrow screen and supports scrolling when needed. Select image to enlarge.
Find backup controls
Scroll below all visible tasks to find Export backup and Import backup. Your device handles saving or selecting the JSON file.
Backup controls appear below the task list on mobile. Select image to enlarge.
Return to Help
The top bar still includes Help. It opens this guide in another tab. Use its topic menu and search to find instructions, or download the PDF for reference.
Timing logs use 30 fps, with zero-based start frames included and end frames excluded.
Move between controls
Press Tab to move forward and Shift+Tab to move backward through links, buttons, fields, and task controls. Press Enter to activate a focused button or link; press Space to toggle a focused task checkbox.
Open New task quickly
Press N while focus is outside an input, text area, select, or editable text. The shortcut does not fire while you are typing, and it ignores Command/Ctrl/Alt combinations. The task-name field receives focus when the editor opens.
Work inside the dialog
Tab between Task name, Notes, List, Priority, Due date, and the action buttons. Use your browser's keyboard controls for select fields and dates. Focus remains in the modal editor until it closes.
Submit or dismiss deliberately
In quick add, Enter adds the task. In the editor, focus Create task or Save changes and press Enter to submit. Use Escape, Cancel, or Close task editor to discard unsaved changes. Enter within Notes adds a new line.
Use accessible names
Screen readers encounter names such as Complete [task name], Reopen [task name], Edit [task name], and Delete [task name]. Notifications announce status changes, and the progress bar is labeled Overall task completion.
In a browser that supports WebMCP and exposes document.modelContext.registerTool, Today List attempts to register three tools for a compatible assistant. This is optional and has no dedicated button in the app.
Watch the walkthrough
0:39 · Subtitled · Niki narration
Subtitles are embedded in the video. Use the player controls to adjust volume or mute, and fullscreen for a closer view.
Recording of an explicitly labeled integration harness calling the actual app handlers; not a native browser-assistant interface.
Transcript & narration timings
Select a timestamp to play that step.
Step 1. Integration demo: this labeled test panel calls the real app handlers, not a native assistant UI.
Step 1. In normal use, a compatible browser assistant must expose these optional tools.
Step 2. list_tasks reads saved task details and IDs without changing them.
Step 3. create_task accepts a title plus optional notes, list, priority, and due date.
Step 3. Run create_task. The actual app saves the new task and shows All tasks.
Step 4. set_task_completed uses a task ID and true or false to complete or reopen it.
Step 5. Verify the checked task in the app. Without tool support, use the normal task interface.
Timing logs use 30 fps, with zero-based start frames included and end frames excluded.
Use a compatible browser assistant
Open Today List in a browser/assistant environment that supports this integration. If it exposes the tools, the assistant can work with tasks saved on this page. The regular task interface works without this support.
Read tasks with list_tasks
The read-only list_tasks tool returns saved tasks and their IDs, names, notes, lists, priorities, dates, creation times, and completion status. An assistant can use the IDs to identify a task for a later status change.
Create a task with create_task
The title is required. Optional inputs are notes, list (Personal/Work/Ideas), priority (low/medium/high), and due in YYYY-MM-DD format. The tool defaults to Personal, Medium priority, and no due date, independently of the current view. A successful call displays All tasks and clears search and priority filters.
Change status with set_task_completed
Supply an existing task id and a boolean completed value: true to complete it or false to reopen it. The saved status and visible list update. The tool does not provide the interface's temporary Undo notification; status can be changed again.
Verify the result in the app
Review the task row and save status. The same data validation and storage limits apply to tool actions. If the browser does not expose these tools, use the standard interface.